Writing documents, surfing the internet, watching videos, or playing games: You want to use your PC and spend as little time as possible on the technology behind it. The operating system only provides the basis for the useful applications. It should be as stable as possible and preferably run unnoticed.
However, it should also provide functions that enable convenient working and without great effort. Windows 10 and 11 already fulfil the requirements of most users to a large extent. Windows does many things automatically and silently in the background.
However, many applications regularly require the user’s attention, for example when updates are due. In this article, we show tools that make it easier to install and automatically update programs, and generally make your PC experience more efficient and hassle-free.
Install programs faster
Install programs: With Winget, you can search for and install programs on the command line. It can also be used to update software.
IDG
There are various ways to install programs under Windows. In most cases, a setup program is used that can be downloaded from the internet. The Microsoft Store can be used as a central software administration center, from which programs can be installed and automatically updated. For this to work, “App updates” must be switched on in the Microsoft Store settings.
However, the Microsoft Store is far from being able to provide all popular programs. With Winget, Microsoft provides a command line tool that can be used to install and update more free programs. The tool obtains software from the Microsoft Store (“msstore”) and the extensive Windows Package Manager Community Repository.
Winget is installed by default in Windows 11; Windows 10 users install the App Installer package via the Microsoft Store. In a Powershell or command prompt started with administrative rights, enter
wingetfollowed by the Enter key to see a list of available options. With
winget search [ProgramName]to search for programs. Replace the placeholder “[ProgramName]” with the name of the desired program. The first time you call up the program, you must accept the terms of use. In addition to the name, Winget displays a unique program ID that you use for the installation. The line
winget install [Program-ID]is used for the installation, which usually does not require any user input.
winget listdisplays the installed programs including version number and available version.
winget upgrade [Program-ID]updates the program specified with “[Program ID]”. With
winget upgrade --allyou can update all packages to the latest version, which can also be used to update a number of programs that have not been installed via Winget.
Update programs automatically
Winget with graphical interface: Wingetui makes it easier to use Winget. The tool can also perform updates automatically according to a schedule.
IDG
Winget can also be used to automatically update applications and tools. The easiest way to do this is via the Wingetui graphical interface.
The tool can search for packages, install them, and display the installed packages. After clicking on “Software updates,” Wingetui displays packages for which updates are available. Click on the button on the far left of the toolbar to update all programs at once.
The “Wingetui settings” can be accessed via the three-dot menu at the top right. For automatic updates, tick “Update packages automatically” under “General settings.”
Under “Start options,” “Start Wingetui automatically in notification area” should be activated so that the tool is available immediately after Windows starts.
As updates and installations require administrative rights, the User Account Control window appears for each individual update, which you use to confirm the increased rights. In the “Wingetui settings” you can tick the box “Ask for administrator rights only once” under “Administrator rights settings.” However, the developer recommends not using this option for security reasons.
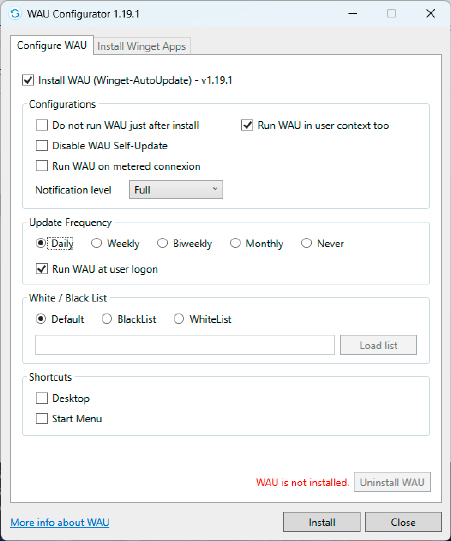
Updates via script: With Winget Autoupdate, you can set up Powershell scripts that perform software updates via Winget largely silently in the background.
IDG
Alternative update script: Winget Autoupdate is a Powershell script for automatic updates with Winget. To install it, start WAU Configurator and tick the box “Install WAU (Winget-AutoUpdate).” Under “Update Frequency,” select a schedule such as “Daily” or “Weekly,” then click on “Install.”
By default, Winget Autoupdate starts the first update directly after installation. For the automatic start, the tool enters itself in the task planning and starts with the rights of the “System” user. It can therefore update all programs with elevated rights; the user account control is not requested.
The tool installs itself in the folder “C:\ProgramData\Winget-AutoUpdate.” The file “excluded_apps.txt” with a list of programs that should not be updated is located here. Add further programs if required. In the “logs” folder, you will find the “updates.log” file, which you can open in an editor and check for updates.
Install the latest drivers
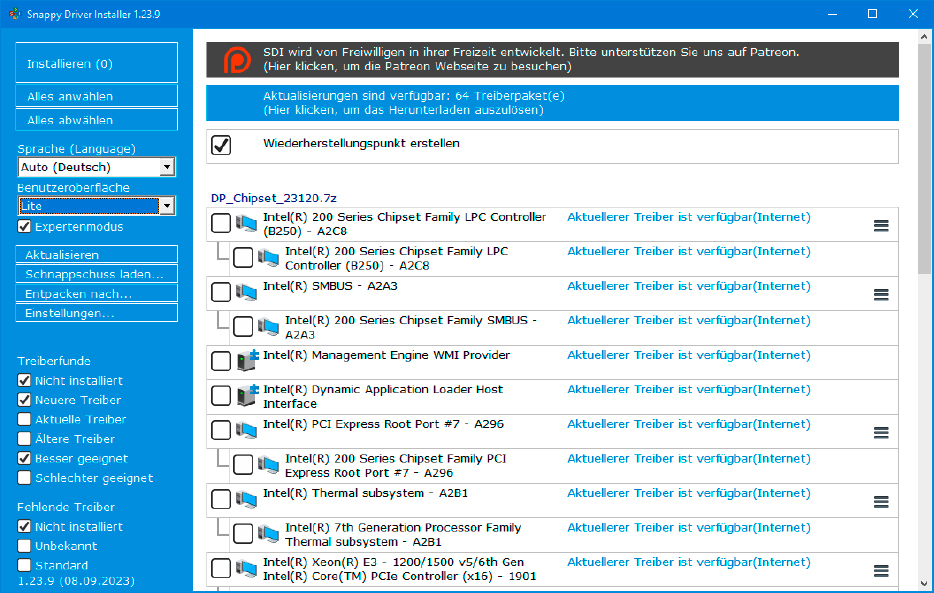
Keep drivers up to date: Snappy Driver Installer detects the installed drivers and checks for updates. A mouse click is all it takes to install updates automatically.
IDG
Windows usually only installs standard drivers automatically, which often do not optimize the performance of the hardware. Better and bug-fixed drivers are available from the hardware manufacturer, but these have to be laboriously searched for on the internet and then installed.
It’s easier with Snappy Driver Installer. The first time you start it, click on “Download indices only.” Once the process is complete, the tool determines the driver versions on your PC and offers updates.
Tick the “Create restore point” box. If a new driver causes problems, use this to restore the previous system status. Click on “Click here to initiate the download,” then on “Only for this PC” and “OK.” After the download, click on “Select all” if you want to install all updates, or select only individual drivers. Then click on “Install”. Finally, restart Windows.
Further reading: Goodbye, bloatware! How to declutter Windows 11
Portable applications instead of installed programs

Updates via script: With Winget Autoupdate, you can set up Powershell scripts that perform software updates via Winget largely silently in the background.
IDG
Portable programs are well suited for a USB stick or an external hard drive. If you connect the drive to another PC, the desired applications, including the customized configuration, are immediately available. They can also be used instead of conventionally installed programs.
PortableApps.com Platform is a starter for numerous free programs and tools. During the initial setup, select the option “Local – install for the current user (private applications and settings)”. Or “Local All users – install for all users (shared applications and settings).” The target folder is then selected.
The first time you start the program, a window will open in which you can select the desired programs. If you would like more information, go to https://portableapps.com/apps. Here you will find detailed descriptions.
After clicking on “Next,” the programs are downloaded and installed. You will see the Portable icon in the notification area next to the clock. Click on it to bring the program launcher window to the foreground. When you start PortableApps.com Platform, it automatically checks for updates and you only need to confirm the installation.
However, the portable programs have one disadvantage: If you are used to opening files by double-clicking on the associated application, you will have to rethink your approach. PortableApps.com Platform does not link file name extensions with programs.
If you want this, use Portable Registrator. The tool shows entries for “Generic Media Player,” “MS Office Word,” or “VLC Player” behind “Program Type:,” for example. Behind “File Associations” you will see the corresponding file name extensions.
Under “Portable executable,” select the desired program from one of the subfolders of PortableApps.com Platform, then click on “Register.” After clicking on the “Add” button, you can define additional programs and file name extensions.
Quickly set up basic software equipment
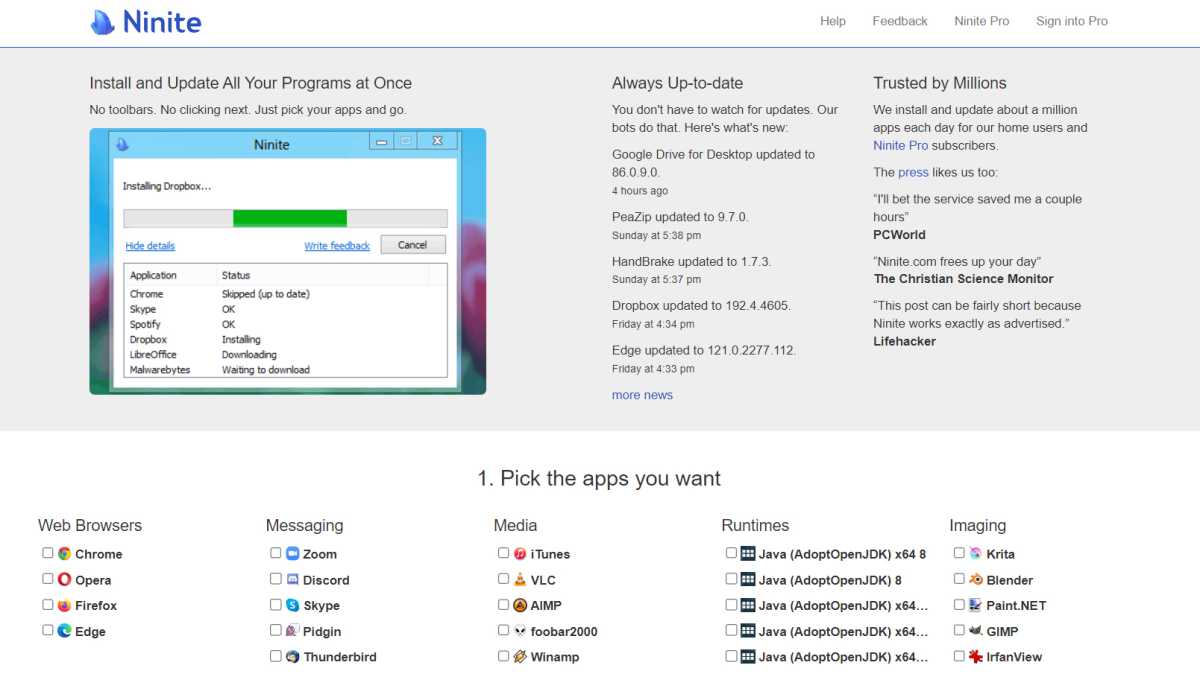
Software installation made easy: With Ninite, you can bundle software packages in a setup program. Updating is also possible.
IDG
Ninite is a service that can be used to quickly compile setup packages with different programs.
This is very suitable for the automatic installation of software or the quick setup of basic software equipment for a freshly installed Windows.
On the website, simply tick the boxes in front of the programs you want to set up. Click on “Get Your Ninite” and download the installer. This will set up all applications and tools at once and without further enquiry. For updates, simply start the installer again at regular intervals. It will always download the latest versions.
Optimize files regularly
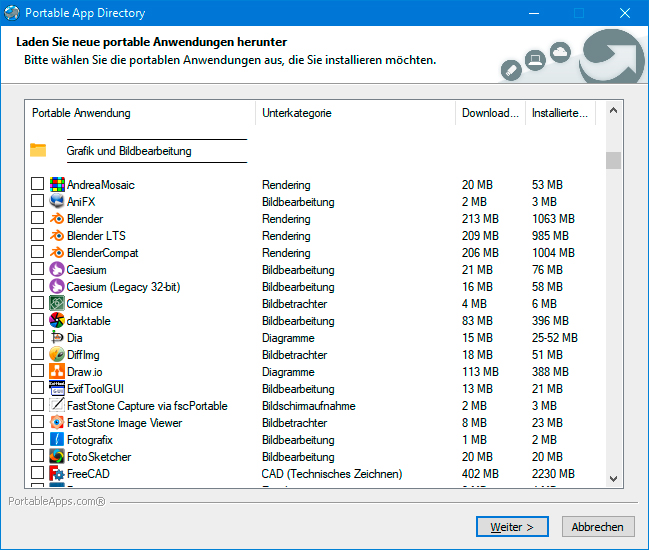
Portable applications: PortableApps.com Platform sets up the selected programs without further queries. The tool also takes care of updating the software.
IDG
If you delete files on a hard drive — SSDs are not affected — the free space is occupied by new files. Data is always written to the next free space. If this is not sufficient for the size of the file, the next free block is used. After some time, more and more files are created whose components are scattered across the hard drive, which is known as fragmentation.
With small files, this is of little consequence. With large files, such as those from games or virtualization software, fragmentation has a significant effect on performance because the read and write head of the hard drive has to cover ever greater distances.
Windows defragments hard disks automatically, but not very effectively. Defraggler does a better job. You can use the tool to clean up an entire hard drive or just certain files and folders. This is particularly useful if you just want to quickly defragment the larger file of a game, for example.
The prerequisite for defragmentation is sufficient free space on the hard drive. Delete files that you no longer need. After starting the tool, select the hard drive you want to defragment from the list, and click on “Check.” The program will now show you the degree of fragmentation as a percentage. Click on “Defragment.”
Alternatively, you can defragment individual files. To do this, go to the “File list” tab. Click on “Fragments” to sort the list so that heavily fragmented files appear at the top. Place a tick in front of the files in question and click on “Defragment marked files.”
Under Settings > Maintenance schedule, set a schedule for defragmentation. Select the desired drive and tick “Include selected drive in the maintenance schedule.” Under “Interval,” select the option “Monthly” and then the day, for example. Tick the box next to “Apply additional conditions” and click on “Specify.”
You can specify that the action only starts from a certain level of fragmentation. For notebooks in battery mode, it is better to select “Do not start the task if the PC is running in energy-saving mode.”
Regular backups
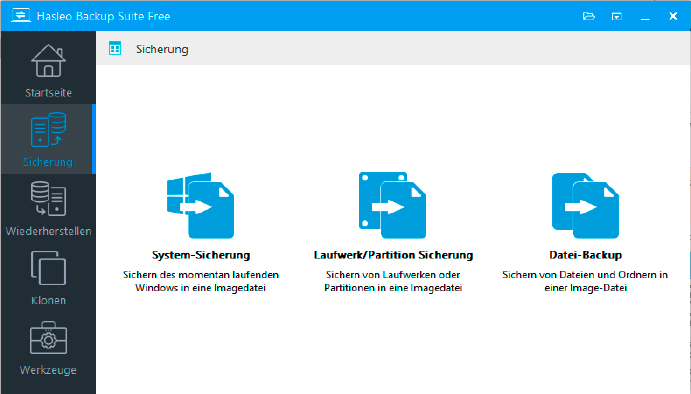
Create regular backups: Hasleo Backup Suite offers all important backup functions. You can use it to back up the entire system or just folders with important data.
IDG
Drives can show errors or fail completely after some time, even with average use. Regular backups are the only way to prevent data loss. For an office and work PC, backing up personal files is usually sufficient. In the event of system problems or a hard drive failure, simply reinstall Windows, install the desired programs and import the backed-up files. If a lot of software is installed on the PC, it may also be worth backing up the entire drive.
With the free Hasleo Backup Suite, you can back up the Windows system drive in an image file, create a backup of individual, selected partitions or only back up folders with important files. The program can also clone drives, i.e. move the system from a hard drive to an SSD, for example.
When you start the program for the first time, you specify the default storage location for backups. This should be on a second hard drive located in the PC or connected externally via USB. This is the only way to restore the files if the system hard drive fails.
Further reading: The best external drives
Hasleo Backup Suite is largely self-explanatory and requires no special configuration. Click on “Backup” and select the backup type, for example “File backup.” Then tick the boxes in front of the folders you want to back up. Click on “Backup schedule,” then on “Add backup schedule,” and set a schedule. After clicking on “OK” and “Save,” you will see the start page with the configured backup entry. Click on “Backup” to perform the task immediately.
To restore files, go to Actions > Restore on the start page. You can select all folders for the restore or subfolders and files. To ensure that newer files are not overwritten, you can specify a different target folder after “Restore to.”
Tip: To be prepared for an emergency, you should create an emergency system that can be booted from a USB stick via Tools > Emergency drive. This allows you to restore system backups to a new hard drive without having to reinstall Windows.
Faster access to settings
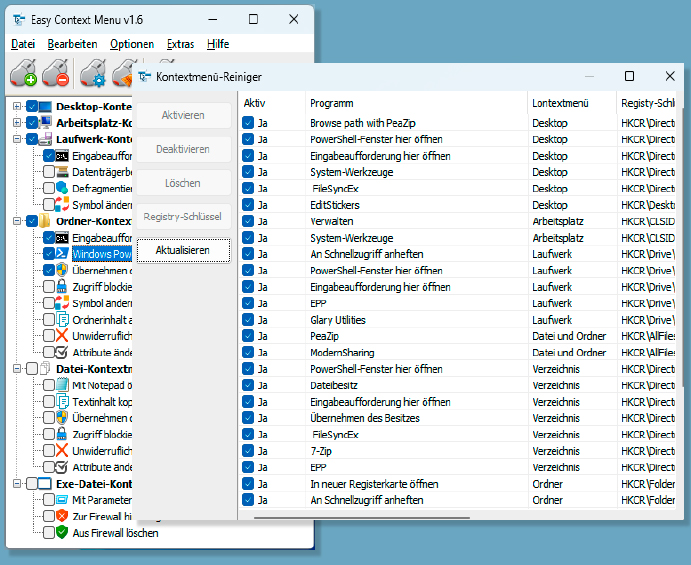
Enhanced context menu: Easy Context Menu adds a new function to the context menu of the desktop and folders, for example. It can also be used to tidy up the context menu.
IDG
Even frequently used Windows functions or settings are not always easy to access. If you want to save yourself the time-consuming search in the Start menu or the settings, you should try Easy Context Menu. This allows you to add additional entries to the context menu, for example for the desktop, drives, folders, or files. You can then quickly access system tools such as computer management or device manager or shutdown options via the desktop context menu. You can edit the available menu entries or add new ones via File > List editor. Unnecessary entries can be removed from the context menus via File > Context menu cleaner.
The English-language Winaereo Tweaker also offers extensions to the context menus with useful functions in the “Context Menu” area. However, you cannot change the list of entries yourself. Instead, you can use the tool under Windows 11 > Classic Full Context Menus to deactivate the reduced context menu of Windows 11. You then no longer have to click on “Show more options” to see all context menu entries.
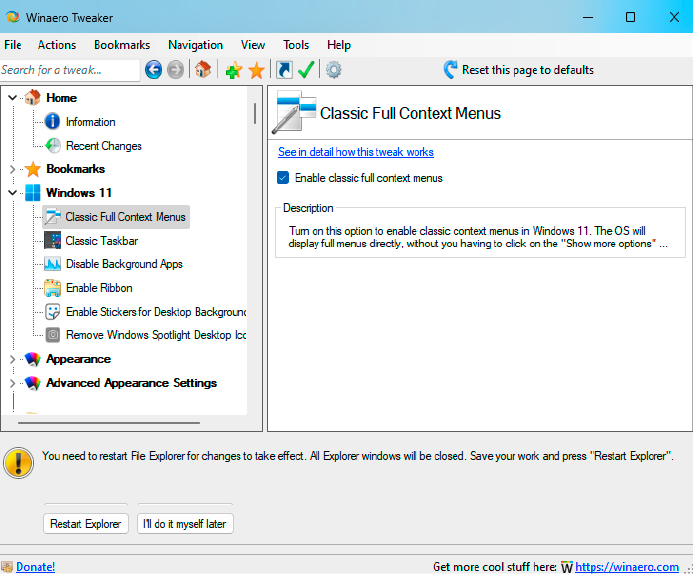
Full context menu: The context menu of Windows 11 requires an additional click if you want to see everything. You can change this with Winaereo Tweaker.
IDG
The Microsoft Power Toys also offer useful tools for more convenient work on the PC. Use the Power Toys settings to activate the tools and define keyboard shortcuts for starting.
The key combination overview displays a list of important Windows hotkeys and the Keyboard Manager allows you to reassign keys. Powertoys Run is a quick start program for applications, folders, or files.
Automate tasks
Autohotkey can be used to assign more complex functions to key combinations. You can simply use it to start programs, transfer a URL to the web browser, or send text to an application.
Autoit is suitable for users who want to create more extensive utility programs. It uses a programming language with a similar syntax to BASIC. The documentation can be found at https://www.autoitscript.com/autoit3/docs/.
Check drive status
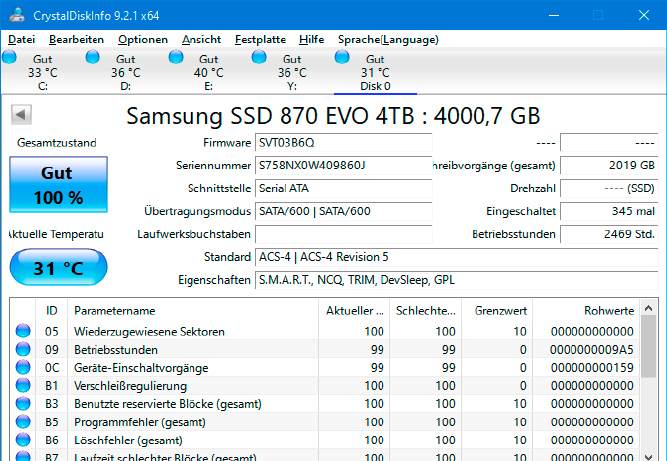
Drives under control: Crystal Disk Info provides data on the status of hard disks and SSDs. You can be warned of critical values.
IDG
When hard disks or SSDs are faulty, you often only find out when it is already too late. SSD manufacturers in particular usually offer tools that can be used to display the status of a drive. Impending defects or the degree of wear can be determined and you can back up data before a failure occurs.
If no tool is available from the manufacturer, Crystal Disk Info can help. The tool provides information on the current temperature of the drives, the number of times they have been switched on, and the operating hours. The S.M.A.R.T values (Self-Monitoring, Analysis and Reporting Technology) can help to detect defective sectors, for example, which are an indication of imminent drive failure.
Under “Options” in Crystal Disk Info, you can activate “Show in notification area” and “Start with Windows.” This means you can always keep an eye on the drive temperature. Select an audio file for the warning sound via Options > Notifications > Warning sound settings and then activate the warning sound. You can specify when Crystal Disk Info should warn you under Options > Advanced options with “Status settings” and “Warning – Temperature.”
This article was translated from German to English and originally appeared on pcwelt.de.


