I’ve been using multiple monitors with desktops and laptops for — oh god — twenty years now. Adding another screen or two is one of the easiest ways to expand a PC’s functionality. And I’ve learned a few things in that time. If I do say so myself, I’ve got a pretty kick-ass triple-screen setup that makes both my work and leisure time much better. I’m here to share my tips on how to make your multi-monitor setup really shine.
Oh, and there are photos of my real, actual, personal home working/gaming setup in here. There’s a bunch of junk and dust around, because writing Boost Mode takes a long time and I can’t clean everything up. Thou hast been warned.
Of course, it all starts with the monitors themselves. Here’s how you pick the best screens for a multi-monitor setup in the internet’s favorite format, a numbered list.
Welcome to the Boost Mode newsletter. Every week I share my insights on PC gaming, desktop setups, and hardware optimization. I also track down some of the most interesting PC and nerd news from around the web, plus a PC game pick you might not have seen elsewhere. Want this newsletter to come directly to your inbox? Sign up on our website!
Step One: Screen Size
This one should be easy. Pick two monitors of the same size, and they’ll look good next to one another. Pick two monitors of the same size and resolution, and they’ll fit perfectly. For example, if you’re starting with a 27-inch, 1920×1080 screen, just buy another 27-inch, 1920×1080 screen, and your physical desk space will match. But the experience is more than physical — your desktop wallpaper, windows, text, and other user interface elements will match, too.
The easiest thing to do is just buy two of the same model monitor. Or if you’re already starting with one, buy the same model again. That’s not always possible, though. Maybe you’re looking for a more affordable option for a secondary screen — say, a primary gaming monitor with a better or faster panel, and a second one just for information. (More on that later!) Maybe your original monitor isn’t made anymore. Go for the same size and resolution if you want them to match, at least nominally.
Brateck
There’s one last thing to consider here: aspect ratio. This is the ratio of your monitor’s length to its width. Most monitors use the standard 16:9 these days — that’s the same shape LCD televisions have been using for over two decades. But there are exceptions. Some work-focused monitors use 16:10. Ultrawide monitors stretch out to 21:9, or sometimes even 32:9 (that is, two standard monitors side by side) for the gigantic screens. This is where things can get complicated, so move on to step two.
Step two: Screen density
DPI or PPI stands for Dots Per Inch or Pixels Per Inch. It’s a small detail, sometimes not even listed on a monitor’s specifications page. But it’s vital to understanding how a good multi-monitor setup works.
Let’s look at two Dell monitors for an example. The screen on the left below, the Dell 27 Plus S2725HSM, is 27 inches and 1920×1080 — pretty much the standard for any budget display in 2026. The one on the right is the Dell 27 Plus S2725DSM. They look identical, apparently having exactly the same body, stands, even colors. But the S2725DSM on the right has a boosted QHD resolution, 2560×1440. So its pixel per inch rating, 108.8, is more than 25 percent higher than the 1080p monitor, just 81.6.
Dell/NBC
If you plug both of these monitors into the same PC, text, images, and other elements will look smaller on the right monitor, and less sharp on the left. You can adjust this a bit in Windows and other operating systems by setting custom scale factors for each monitor in the display settings. But it’s never going to be a perfect match. To make things look good and to make your desktop flow better, make sure to get two 27-inch 1080p monitors, or two 27-inch, 1440p monitors.
You can fudge this a little bit. For example, Dell also sells a 4K monitor in the same family, the Dell Plus S2725QS. It’s exactly four times the resolution as the 1080p monitor, 3840×2160, double the pixels on the vertical and horizontal. You could set the 4K monitor to 100 percent scaling and the 4K monitor to 200 percent, and get Windows to at least look consistent across them. But the 4K monitor will still be four times as sharp, causing (at least in my opinion) a lot of discomfort.
But a little bit of mindfulness can be extremely helpful here. Let’s look at my desktop setup, chosen very carefully. I use 1440p resolution, exactly 1440 lines vertically, across all three monitors. Which might sound strange, because the center monitor is clearly bigger than the other two. But here’s the thing: it’s wider than the monitors on the left and right, but exactly as tall, with the same vertical resolution. A 34-inch ultrawide, at 3440×1440, is essentially just a stretched-out version of a 27-inch, 2560×1440 monitor — it’s using a 21:9 aspect ratio instead of 16:9.
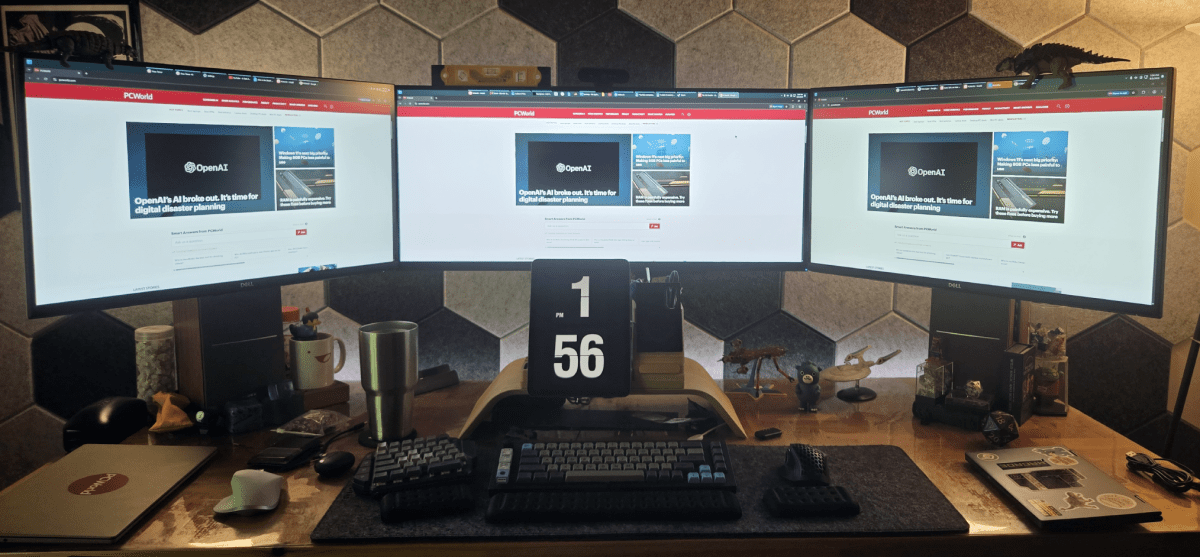
The 27 inch side monitors have the same 1440p vertical resolution as the 34-inch center monitor, with nearly identical PPI.
Michael Crider/Foundry
So the monitors on the left and right have a PPI of 108.8, and the center monitor is 109.7. That’s less than a one percent difference, so the visual elements move across all three monitors seamlessly. If you’re working with monitors of different size, get the DPI or PPI rating as close as possible. This is true even if you’re putting one monitor vertical and the other horizontal, because you still want consistency across your screens.
Step three: Screen panels and quality
You probably know that not every monitor is made equal. OLEDs are more vibrant and colorful than standard LCDs, gaming monitors are faster than non-gaming monitors, et cetera. But there are distinctions even in the panel types themselves. Newer OLEDs have more advanced panels that are brighter and show clearer text. IPS-LCD monitors are more color-accurate, while VA-LCD monitors are usually faster and cheaper.
I’m going to assume that you don’t have an unlimited budget, and can’t just get triple 4K OLEDs right off the bat. So if you’re not matching up your monitors with identical models across two or three screens, odds are pretty good that you’re going to prioritize one screen more than the others. Focus on a high-quality panel for that screen — the middle one for a triple setup, of course, your eye preference or ergonomic necessity for a dual monitor setup — and you can save money on the others.
Jon Martindale / Foundry
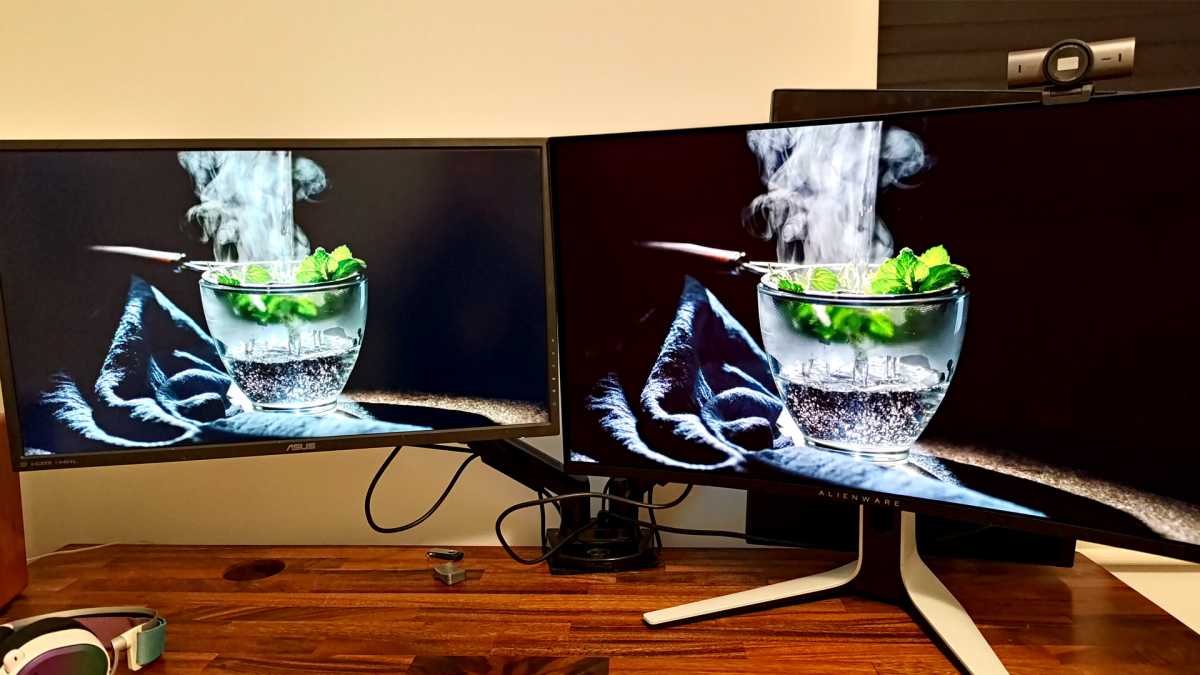
Let’s say you want a dual setup, but you’re planning on using it for PC gaming. You can get a 27-inch gaming monitor, like this OLED QHD model from AOC, as your primary display. Not only will the picture look gorgeous, its 240Hz refresh rate will make gameplay smooth for online competition. It’ll look great for video, too. Pick a cheaper standard LCD, in the same 27-inch, QHD format, for your secondary monitor. On that side you can put game guides or Discord chat (or a YouTube video, let’s be honest).
So you’ve got a great gaming setup, and you haven’t broken the bank by buying two OLEDs. Not only will your games and movies look fantastic, the setup works great when you’re not playing, keeping that consistency for visual elements across two displays. I had a 34-inch OLED in my center space, and loved it…but I cheaped out and bought it used, and it died on me. For now I’m going with this budget alternative, a speedy gaming-grade IPS from a whitebox label.
Step four: Mounting hardware
The displays are obviously the big point here, everything else is secondary. (Though you will need to make sure your desktop, laptop, and/or your docking station can actually handle triple monitors, of course, and match the inputs.) But one of the core elements of making your multi-monitor setup actually look good is getting those screens at the same level, or at least an ideal level for you and your desk. That means mounting hardware — monitor stands or monitor arms. For this, VESA is your friend.
Okay, VESA is the Video Electronics Standard Association. Presumably the organization isn’t your friend. And VESA has a lot of different standards. But the one we’re interested in is the VESA Flat Display Mounting Interface system, the industry’s most common screen mounting system. This is four holes in a square setup, 100 millimeters on each side, using M4 10mm screws. It’s dead simple, and it’s included on almost all new monitors today, even though they include their own proprietary stands in a box.
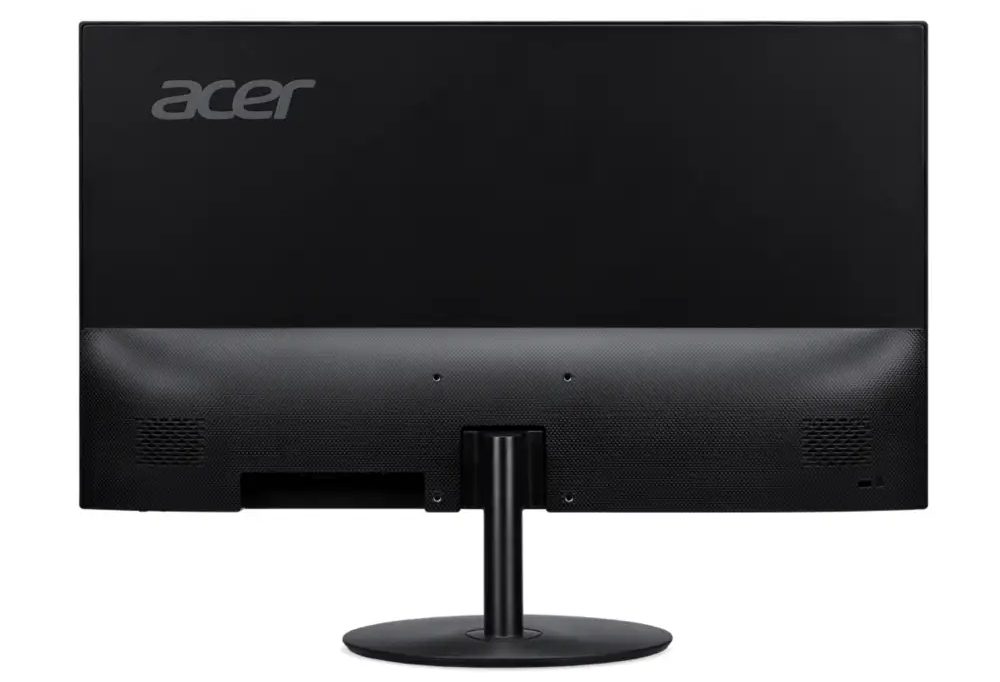
This super-basic monitor comes with a stand with zero adjustments.
Acer
The reason you want this is that the stand in the box…sucks. Almost always. Most budget monitors don’t have a stand that can move up and down, an absolute travesty for a good desk setup. And even the nicer built-in stands often don’t go very high. For ideal ergonomics, you want your eyes to be at the level of approximately the middle of your screen or slightly above that. A box or books under a regular stand can work for this, but obviously it’s less than ideal.
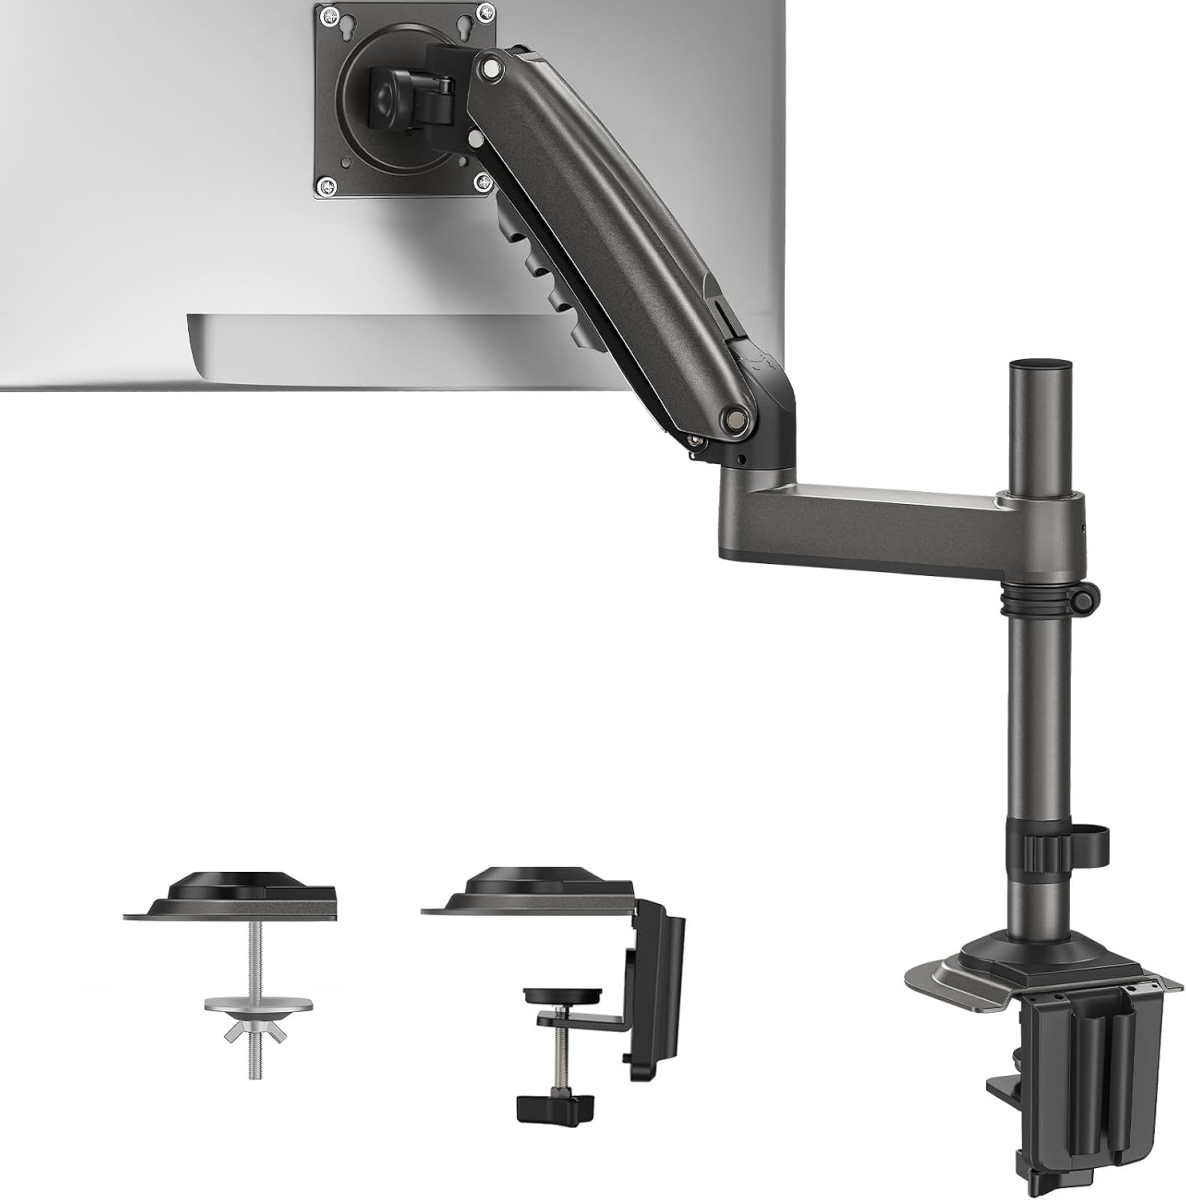
Huanuo
VESA stands are the solution. A regular stand can replace your monitor’s built-in stand, and it only requires a few minutes with a screwdriver to set up. But if your desk will allow it, a clamp-on monitor arm is definitely the way to go. Not only are these a lot more flexible than a rigid stand, easily accommodating almost any angle or orientation, they free up space on your desk itself. A regular arm will work with most monitors, but anything bigger than 34 inches might need a deluxe reinforced model. I’ve been using these arms for years, and can recommend them.
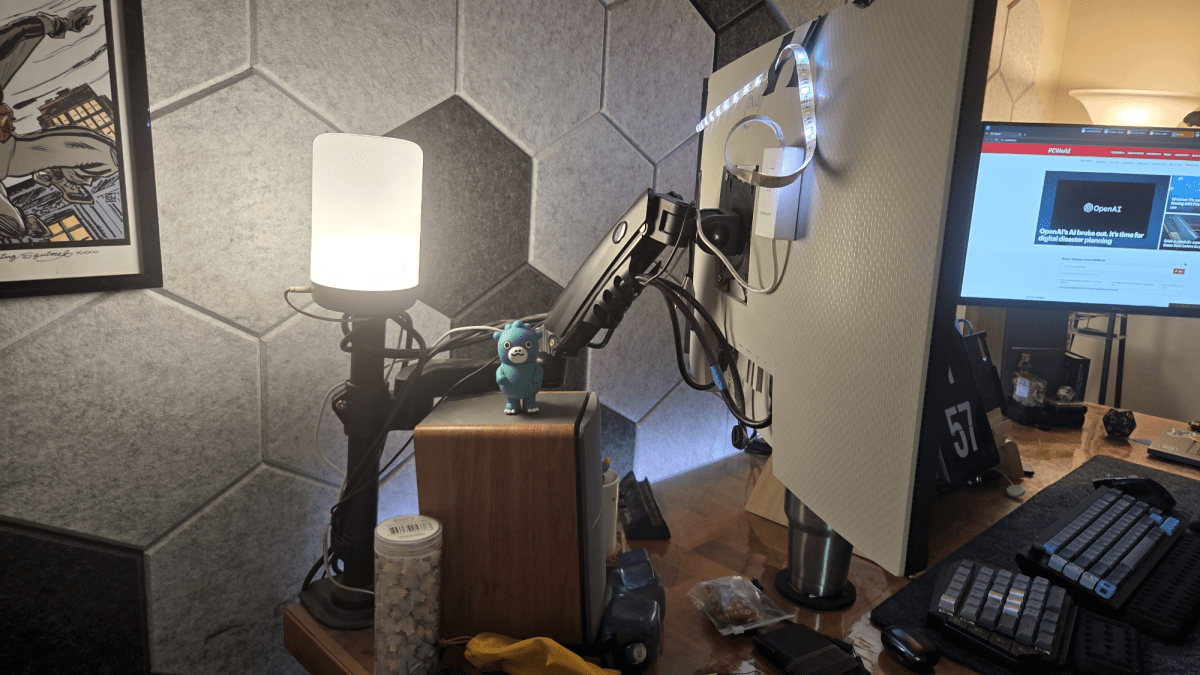
You might be tempted to judge me for my mess or dust. But look at Chibi Godzilla right there. He’s watching you. He knows you’re better than that.
Michael Crider/Foundry
Take a tip from me: if you’re going with multiple monitors, mount each one to a single stand, don’t bother with dual or triple stands on the same base. It’s so much easier to move them around, adapt to new screens, and find the ideal position if each one is on its own dedicated arm. Speaking of which…
Step 5: Arranging your screens
Believe it or not, this is what gives me the most trouble. It’s easy enough to squish two monitors up next to one another when you’ve got them on stands…assuming that they can get to the correct height, and you have the space on your desk. But arranging three big screens at ideal angles, all on gas springs and multiple hinges with six points of adjustment, is my personal Sisyphus boulder.
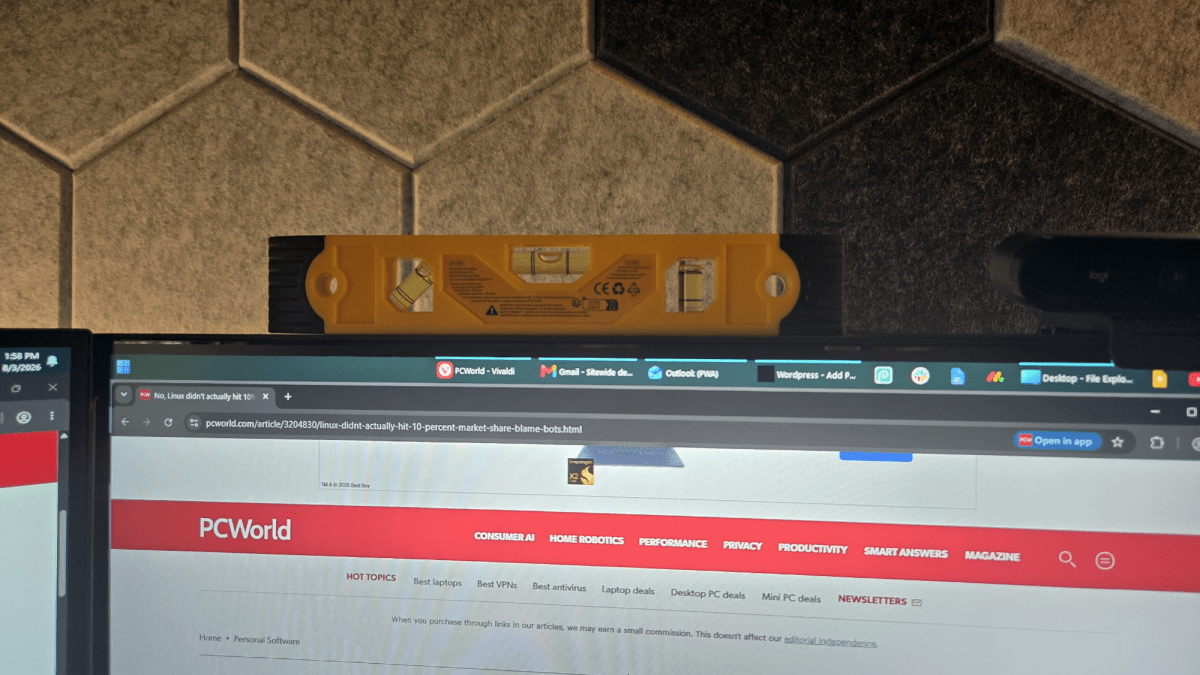
I’m gonna be real with y’all: Getting that bubble in the middle, across three monitors, each on a multi-point adjustable stand, was an incredible accomplishment.
Michael Crider/Foundry
Here’s the thing. You want to be facing roughly head-on for a monitor when you’re looking at it, so your eyes are approximately even with it at whatever angle it happens to be. But that will change, depending upon its position on your desk, your position relative to the screens, et cetera.
Finding an ideal spot and angle for two screens is tough. Finding it for three is very challenging. Finding that ideal position and angle for three monitors, each of which has a vertical adjustment on a pole, two hinge points in the arms, another hinge at the head that can spin on its own axis, and a gas-spring arm on top of all that, is insane. I have to measure their position clamped to the desk, measure their distance from the desktop to get the ideal height, measure their level across both individual monitors and all three monitors at once — I promise, it’s a much bigger task than you think it is when you start. I’ve been making adjustments for 20 years, and it’s still a few millimeters off.
Here are my tips:
- Prioritize your physical comfort over visual appeal. A computer is meant to be used, not just admired.
- Make sure each monitor is comfortable to view from wherever you sit most often. This will be different based on size and angle. I’ve found that the goal is for the monitor to be parallel with your eyes when you turn your head, and for my 27-34-27 setup, about 30 inches away works best.
- Use rulers and bubble levels to keep things consistent across your monitors, at least as much as possible. A protractor can help keep triple setups like mine at a consistent angle.
- Don’t lock down your setup until you’ve used it for a week or so and you’re sure you like it. Keep those hex keys handy, and don’t tighten anything too much. Keep some slack in cables in case you need to move things.
- Once you’re sure that you’re ready to commit, it’s time to get things stable. Tighten up the various adjustment points on your stands, make sure your monitor, power, and USB cables are correctly placed.
What I do next to set my angles and minimize movement is a little unorthodox: I tape it all down. I use double-sided foam tape to keep the bezels of the monitors stuck to each other, and Gorilla Tape on the rear.
It looks like hell back there, I’m not going to lie. And getting any new monitors in, on the rare occasions that I do, is an exhausting process. But this is the best way I’ve found to keep the monitors aligned and stable for a long period of time. It’s true, duct tape really is a universal solution.
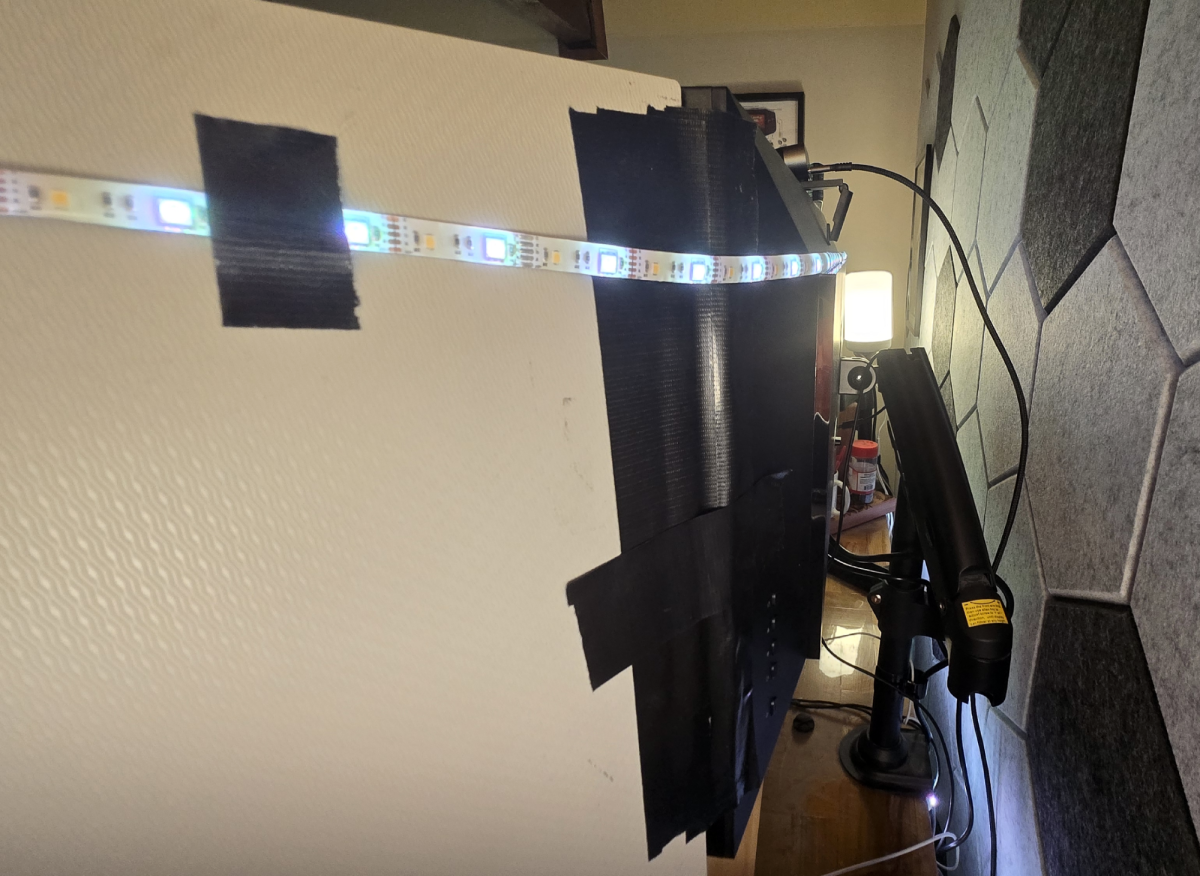
Duct tape and WD-40 can fix just about anything.
Michael Crider/Foundry
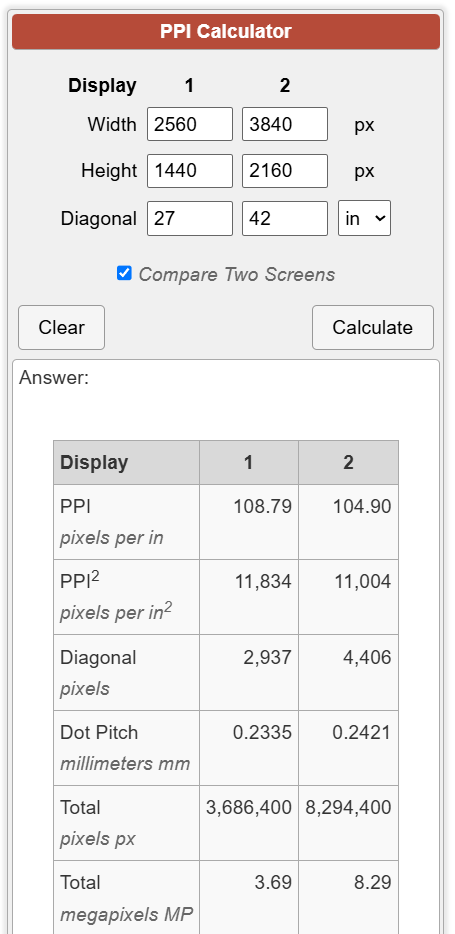
I could talk for literally hours on multiple monitor setups. For example, I’ve been itching to try a vertical-horizontal-vertical arrangement for a while…and those 45-inch OLEDs from LG would pair nicely with, say, a 24-inch, 1080p vertical monitor in terms of size and PPI. Or a 27-42-27 setup would work well, with QHD on the vertical sides and 4K in the middle. You can use this great tool to calculate the relative sizes of different screens and aspect ratios, and this one to keep PPIs consistent.
But I’ll leave you with one final and vital tip: don’t forget lighting. With two or three (or more) screens in front of you for hours at a time, you want a well-lit room, preferably with some light behind the monitor too to avoid eye strain.
Bias light strips are great for this, and I use them myself as you can see above. But I’d also put some desk lamps back there. I Wi-Fi table lamps, handily connected to Google Home for voice commands to easily turn them on and off.
Cool stuff from around the web
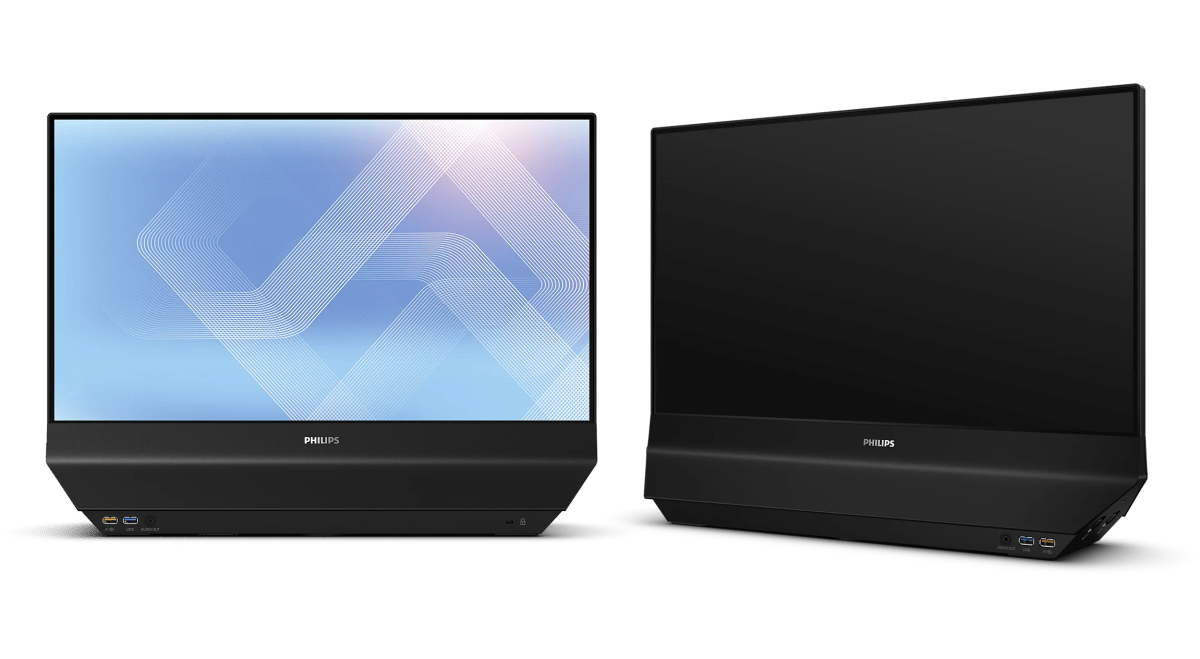
- This dual monitor is literally double-sided: Keeping with the theme this week, here’s a new monitor design that’s two in one…but not in the way you might expect. The Philips 24B2D5300 has two 24-inch, 1080p panels on opposite sides, ideal for presentations or a customer-facing desk setup. It does have separate inputs for both sides, so you could use it for two different PCs at the same time…hmm, the possibilities.
Philips
- Proton performance improvements boost 1% lows on Linux and Steam Deck: The Valve-backed Proton system is what makes Windows games play nice with the Linux-based SteamOS. The latest patches make it a lot smoother when the performance gets choppy. That’s great news for Steam Deck owners, or anyone trying to game on Linux and low-end hardware.
- Play Halo: Campaign Evolved in splitscreen, on your PC: If you remember the original Halo on Xbox, you probably know that split-screen is key to the series’ history. The new remaster of the original game is amazing, but it only has networked co-op on PC. This mod lets you play it in splitscreen, as the good lord intended.
- Pokemon: Red and Blue gets a 3D voxel makeover: There are a million different ways to play Pokemon, but if you want a really interesting way to experience the originals, check out this amazing system that uses the original game ROM and translates it into 3D voxels, like those fancy new Square Enix RPGs. You’ll need a Red or Blue ROM to play it on PC…but I think you can probably track one down.

- Team Fortress 2 collection selling for $100,000: The multiplayer shooter TF2 isn’t getting a lot of love from Valve these days, but the community is going strong. At least one player is ready to move on, selling 1.7 million unopened game crates for $100,000 USD. It’s taken them almost a decade to amass that collection, and a lot of technical work-arounds just to store it. Apparently they’ve already found a buyer, and this is all legit.
Game pick of the week: How Many Dudes?
Butterscotch Shenanigans
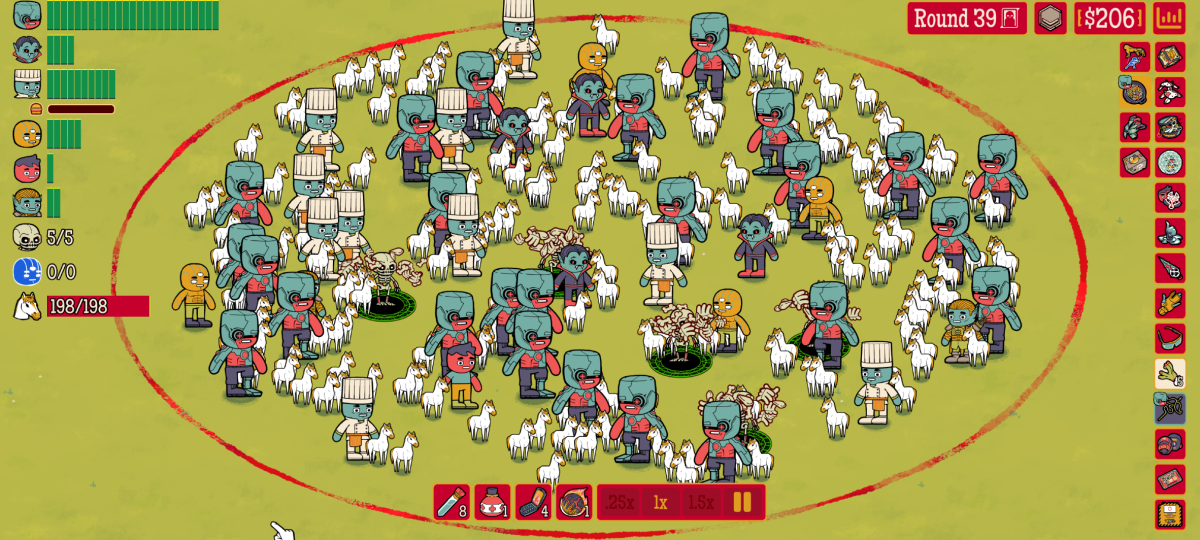
Would you rather fight twenty duck-sized horses, or one horse-sized duck? How many toddlers could you (entirely theoretically) defeat in mortal combat? These are the questions that How Many Dudes? Seeks to answer.
Start with one Regular Dude versus various odd combinations of animals (and toddlers), recruit new Dudes, like Cleric Dudes, Cyborg Dudes, or Chef Dudes. Power them up with various buffs and gadgets. Let them play off each other and combo their abilities. And see how long they can survive.
This game is an auto-battler with roguelike elements, a mix of 9 Kings and Balatro. It’s all about managing resources and finding unexpected combos, a great zone-out-and-get-one-more-run-in kind of feel. Just watch the clock, I’ve lost multiple nights to this one already.
How Many Dudes? is $15 on Steam, currently on sale for just under $10. It’s also available on iOS and Android, and there’s a free demo of the PC version.
That’s all for this week. To get my editorials, news picks, and game recommendations delivered straight to your inbox, you can sign up for Boost Mode on the PCWorld Newsletter hub. Check out The Full Nerd, Prompt Mode for “AI” tips, Safe Mode to keep your PC and gadgets secure, and Smart Mode to boost your productivity.


