You may have heard that backing up your data with a cloud storage provider isn’t good enough. After all, can you really trust services like Apple iCloud, Microsoft OneDrive, and Google One with your precious documents and photos?
You may recall, for instance, the time that Google Drive temporarily wiped out six months of backups for some users. Then there was the time a software developer obliterated his entire iCloud library by accident, only to be saved by Apple after tech bloggers took notice. Similar horror stories abound from folks who trust all their data to a single cloud storage provider.
For those reasons, techies often recommend keeping multiple copies of one’s data—including an offline copy if possible—but this advice has one big problem: Once you’ve saved lots of photos, videos, and other data to the cloud, your computer might not have enough free storage space to sync it all back down. That in turn makes it harder to create regular copies on an external drive or cloud backup service.
So let’s address this issue with several ways to back up your data from cloud storage, either to an external drive or another cloud storage provider.
This column first appeared in Jared’s Advisorator newsletter. Sign up to get more tech tips every Tuesday.
Automatic Google Photos backups
Jared Newman / Foundry
Credit where due: Google Photos makes it easy to download a copy of all your pictures and videos. It can also back them up directly to other cloud storage services on a routine basis. Here’s how:
- Head to the Google Photos settings page.
- Click the drop-down arrow next to “Export your data.”
- Click the button that says “Backup.”
- On the next page, click “All photo albums included” to choose which albums your want to back up, or just click “Next Step” to save them all. (If you don’t see the album selector, you may need to wait a minute or reload the page.)
- Use the “Transfer to” dropdown to choose how to get your files. You can send files directly to Google Drive, Dropbox, Microsoft OneDrive, or Box, or get a download link for saving to your computer.
- Choose to export just once, or every two months for a year, then hit “Create Export.”
This process can take a while if you have lots of photos and videos, but you’ll get an email when it’s done.
Further reading: PCWorld’s picks for best online backup services 2024
Download your iCloud Photos and Drive files
Jared Newman / Foundry
Because of how Apple manages storage for iCloud users, knowing where your photos are can be tricky. On iOS, it offers an “Optimize Storage” setting, which, if enabled, replaces photos on the device with low-quality versions when storage runs low while keeping full-resolution copies in iCloud. It does the same on MacOS when iCloud’s “Optimize Mac Storage” setting is enabled.
If you’re an iCloud user and have enabled these settings, your data won’t be saved in full on your devices, which means you can’t merely copy it all to an external drive for safe keeping. By contrast, turning off optimized storage on a Mac can quickly fill up the computer’s limited built-in storage space.
The workaround is to periodically download a copy of everything directly from Apple for safe keeping. You’ll need to do this on a computer, where you can save the files to an external hard drive.
For iCloud Photos:
- Head to the iCloud Photos website.
- From the Library section, click on a single photo, then hit Cmd+A (or Ctrl+A in Windows).
- Click the download icon (the cloud with an arrow pointing down).
- When prompted, choose where to store your photos, which will be saved in a ZIP file.
For iCloud Drive files:
- Sign into Apple’s Data and Privacy portal.
- Select “Request a copy of your data >”
- Scroll to the bottom and check the box for “iCloud Drive files and documents.”
- Click “Continue,” choose a file size (I suggest 25GB), then hit “Complete request.”
Note that for iCloud Drive, you may have to wait up to seven days to get your files. You can also request a copy of your iCloud Photos through this method, but the same waiting period applies.
Copy iCloud Photos to Google Photos
Jared Newman / IDG
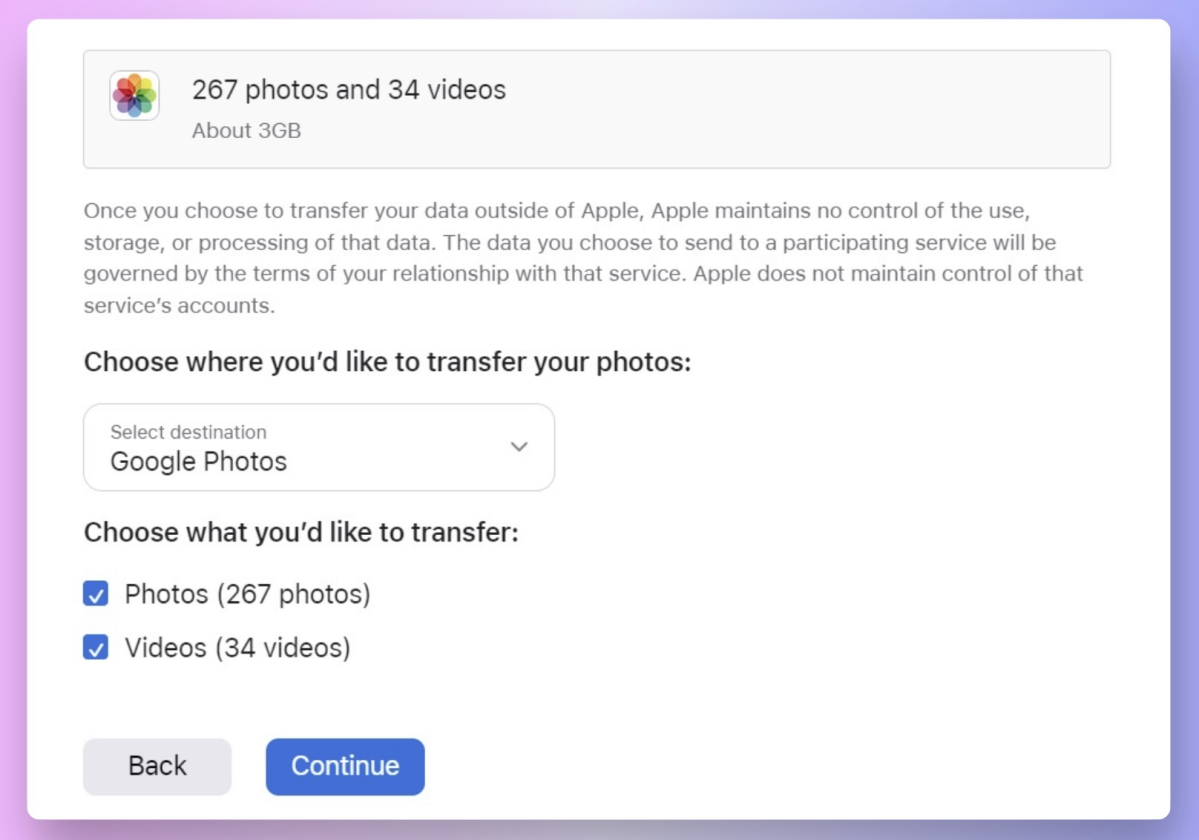
For a simpler way to backup your iCloud Photos library—albeit one that requires more cloud storage—you can copy everything to Google Photos instead:
- Sign into Apple’s Data and Privacy portal.
- Select “Request to transfer a copy of your data ›”
- Use the “Select destination” dropdown and select “Google Photos.”
- Check the Photos and Videos boxes, click Continue, then click Continue again.
- Sign into your Google account, then click “Confirm Transfers.”
Apple says this can take between three and seven days, and you’ll get an email when it’s done.
Send cloud files directly to an external drive
Jared Newman
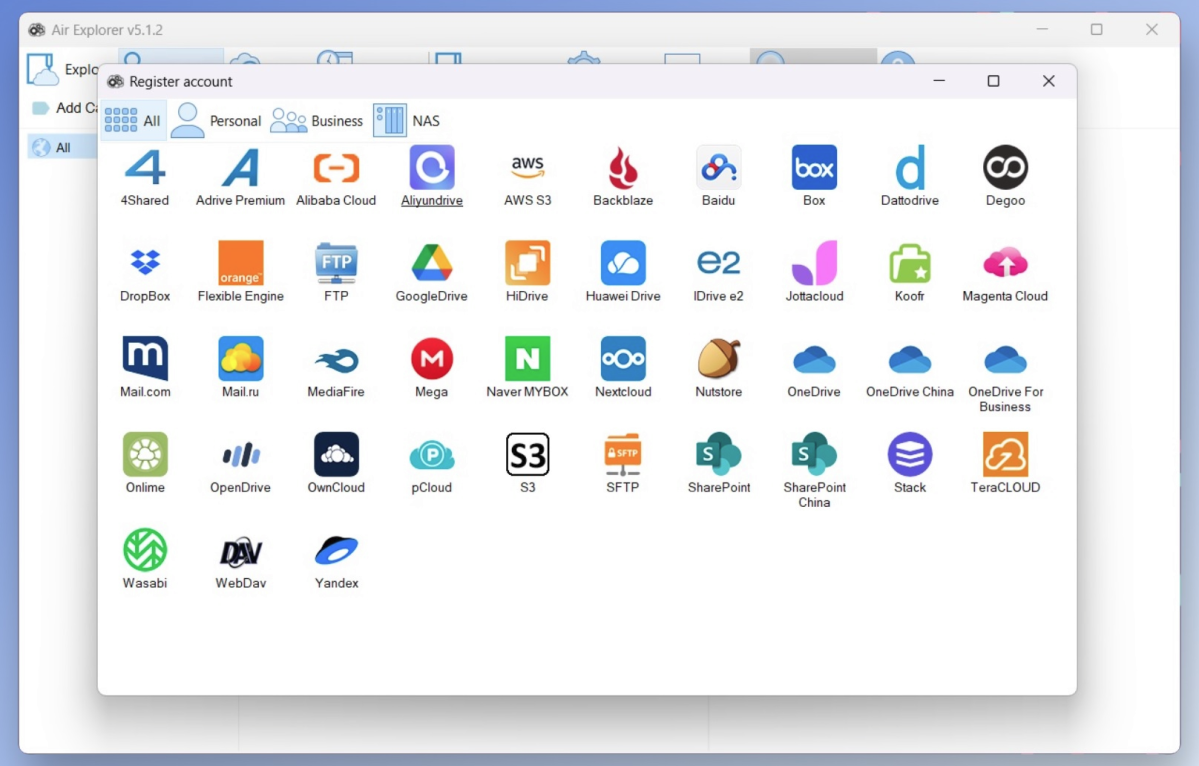
I’ve saved my favorite solution for last: With a free program called Air Explorer, you can download files in bulk directly to an external drive from a wide range of cloud storage services, including Google Drive, Microsoft OneDrive, Dropbox, and Box. You can also copy files to another cloud storage provider or backup service.
Compared to the solutions above, Air Explorer has more of a learning curve, but it’s also more powerful and flexible. Here’s how to set it up:
- Download the app for Windows or MacOS.
- At launch, you’ll be prompted to connect a cloud storage service. Use the “Accounts” tab to add more services if you’d like.
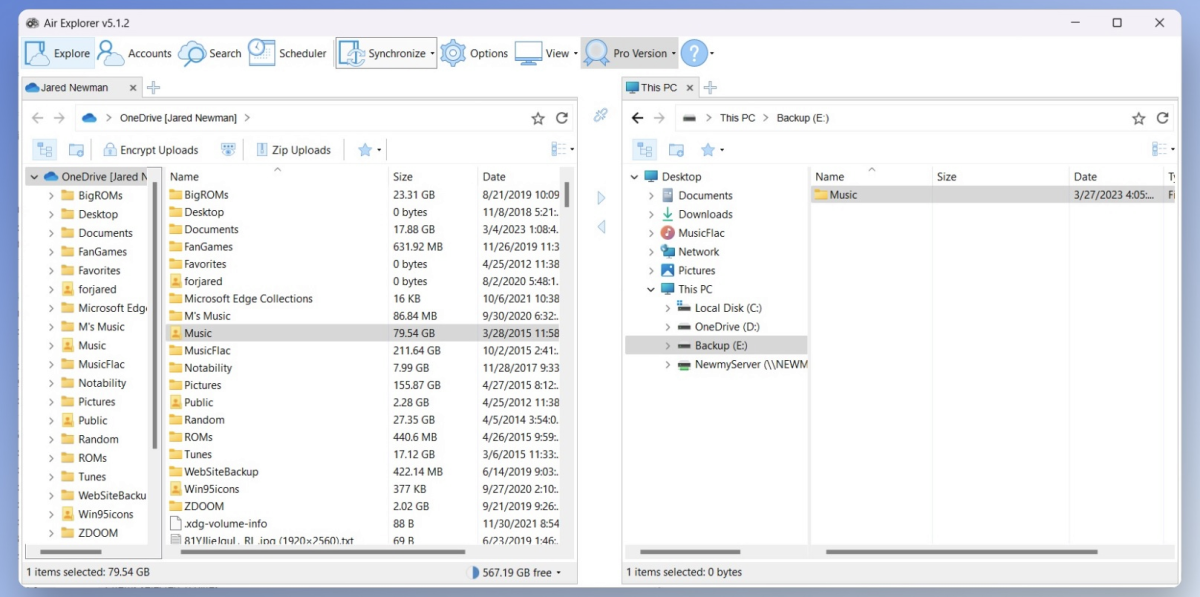
- In the “Explore” tab, select your cloud storage service on the left side, and your storage destination (such as an external drive) on the right.
Jared Newman / Foundry
- On the left side, select the cloud storage folder you want to back up, or just leave the entire drive selected to back up everything.
- On the right side, navigate to the folder where you want to save your backup, then click on it.
- Click the “Synchronize” button and select “Current Folders.”
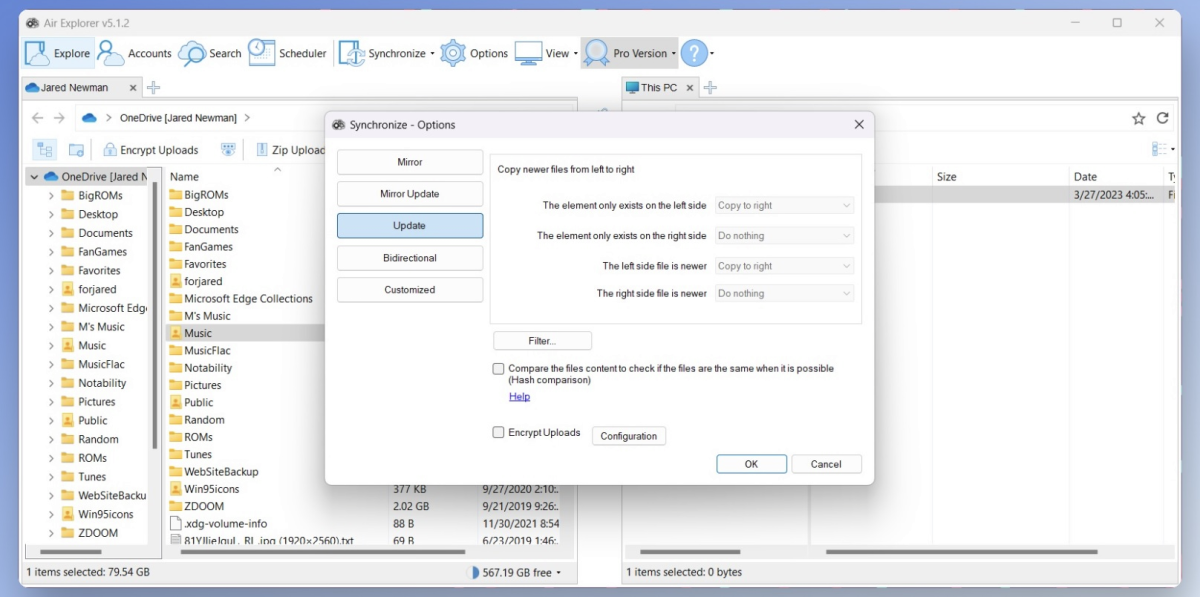
At this point, you have a few options for how to create the backup. I suggest choosing “Update” instead of the default “Mirror,” as the latter will delete any files on your external drive folder if they’re not already stored in the cloud.
Jared Newman / Foundry
Next:
- Click “OK.”
- On the next screen, click “Compare.”
- Click “Start the synchronization automatically when the comparison finishes,” or just wait for the comparison to finish and click “Start” on your own.
Jared Newman / Foundry
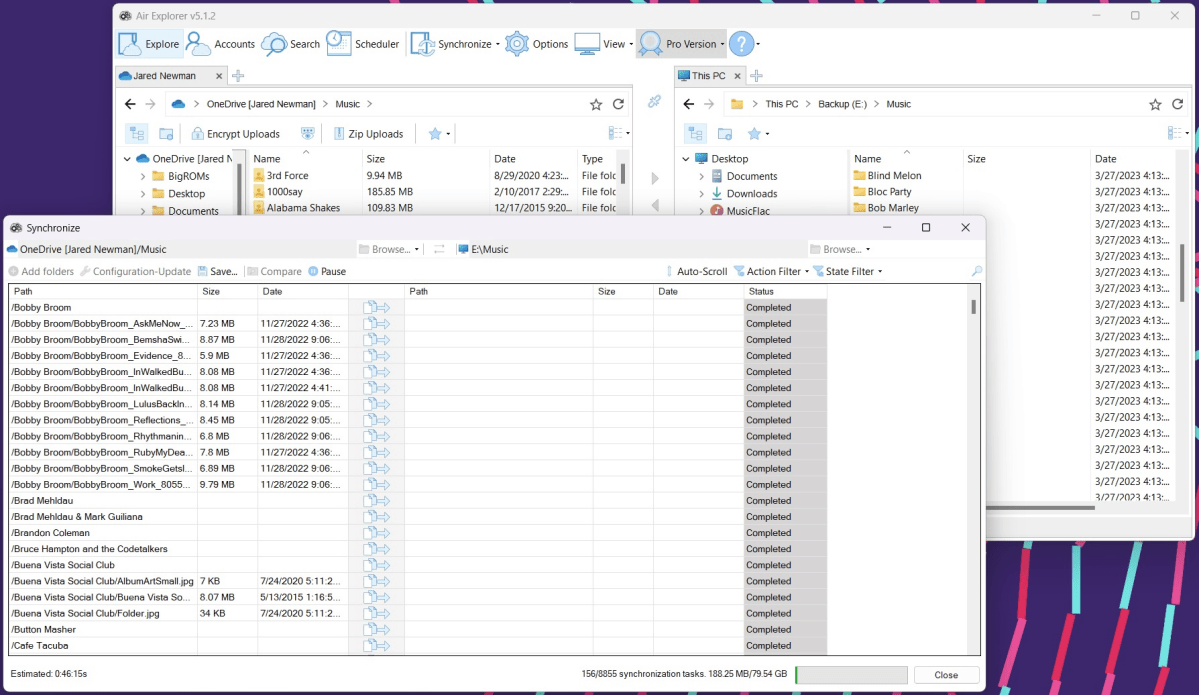
At this point, you’ll see a progress indicator for all your files. If all goes to plan, you’ll have a local copy of all the files from your cloud storage.
Unfortunately, the free version of Air Explorer doesn’t support automatic backups, so you’ll have to remember to periodically make backups on your own. If you want to schedule backups to run automatically, Air Explorer’s “Pro” version is a $42 one-time purchase.
A note about NAS
If you’re using a Network-Attached Storage device, it may also be able to make local copies of your cloud files. Synology, for instance, offers a Cloud Sync app for its NAS devices, while QNAP offers a similar Cloud Drive Sync tool in its own app store. I haven’t used these myself, but they should be similar to using Air Explorer with an external drive.
This might seem like a lot to deal with, but by making extra copies of your data—and your precious photos in particular—you’ll gain extra peace of mind that some technical snafu won’t wipe out your digital life.
Sign up for Jared’s Advisorator newsletter to get more tech tips in your inbox every Tuesday.


