Summary created by Smart Answers AI
In summary:
- Macworld explores how iPhone users can capture more natural-looking photos by bypassing Apple’s aggressive computational photography processing like Smart HDR and Deep Fusion.
- The guide highlights third-party apps like Halide’s “Process Zero” feature and built-in 48MP HEIF settings that reduce over-sharpening and artificial enhancement.
- These techniques produce flatter, more analog-style images that offer better editing flexibility, though they sacrifice some convenience features like Live Photos.
For years, the iPhone has been my go-to camera. It’s fast, reliable, and consistently delivers good results in most situations, which makes it much more convenient than carrying a DSLR around. But over time, I started to notice something frustrating: my photos looked less natural and more like something a computer thought would look good.
The problem here isn’t the hardware, but everything that happens after you press the shutter button. As phones get smarter, the companies that makes them are using more technology to post-process images and make them look “better.” But sometimes the result is far from ideal, which led me to look for alternatives to take photos that actually look like photographs.
If you’re an iPhone user who isn’t a fan of the default camera app’s image processing, here’s how I’ve been taking much better photos with the help of a few apps and even some built-in tools available on iOS.
The problem with iPhone photos today
Essentially, photography is all about light. The more light you have, the better the photo will look. But smartphones have significantly smaller lenses and sensors than regular cameras, so companies have to use some tricks to make the photos look brighter and less grainy.
The solution is something we know as computational photography, and modern iPhones rely heavily on it. Features like Smart HDR, Deep Fusion, and Apple’s Photonic Engine combine multiple exposures, adjust tones, boost brightness, and sharpen details, all in the name of improving image quality.
And to be fair, this works most of the time. You get a bright, detailed, ready-to-share photo. But as this processing becomes too excessive, some photos end up looking completely unrealistic.
Highlights are often pushed too far. Shadows are lifted to the point where contrast disappears. Skin tones can look off. And perhaps most noticeable of all, there’s an aggressive level of sharpening that gives photos an almost crunchy texture.
Foundry
It’s not uncommon to see people online claiming that photos taken with older iPhones look more natural than those taken with newer models. In particular, I’ve noticed that Apple’s post-processing techniques have become more aggressive since the iPhone 13 Pro.
Unfortunately, Apple doesn’t let users turn off all that image processing in the iPhone’s native Camera app. Even shooting in ProRAW still involves a significant amount of computational photography. You get more flexibility, but not necessarily a more natural photo.
Where third-party apps come in
For users like me who have been unhappy with the iPhone’s built-in Camera app, there are plenty of other photo apps with manual controls available on the App Store. One app of note is Halide, one of whose developers was recently hired by Apple.
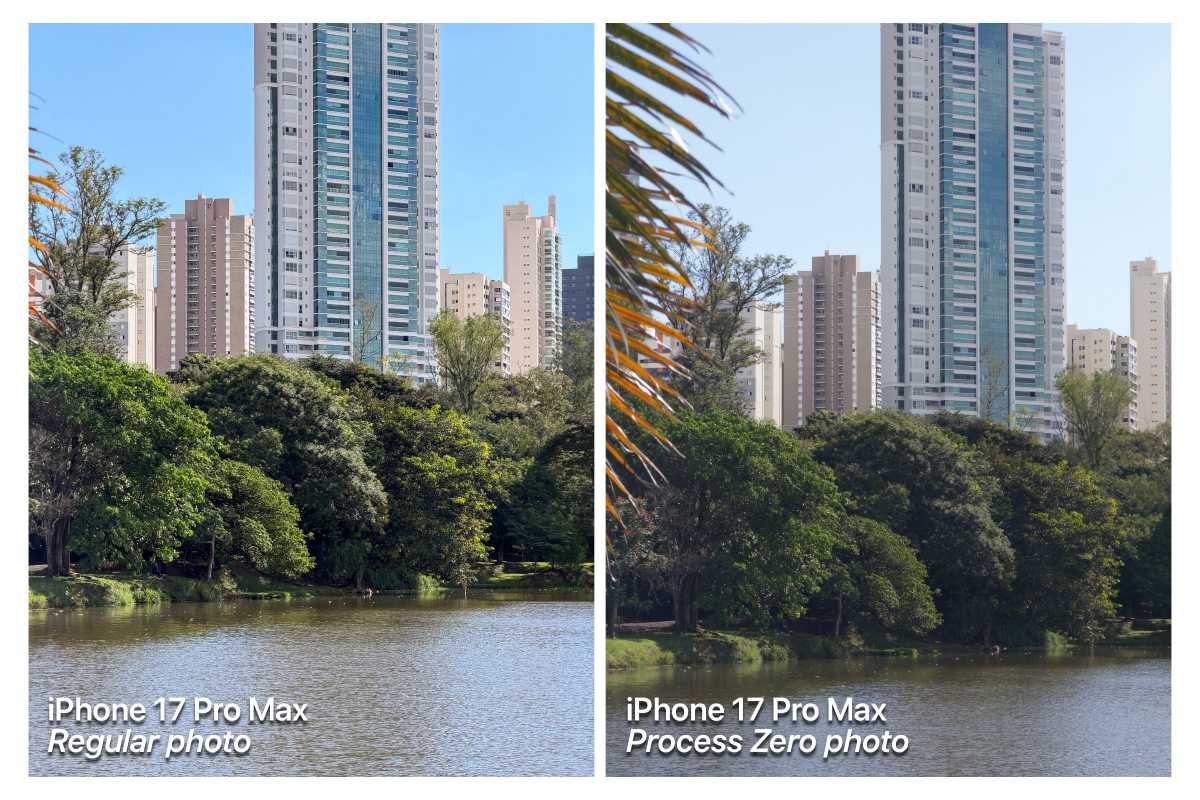
Halide has a feature called Process Zero, and it has become one of my all-time favorites. Instead of stacking multiple exposures and applying Apple’s entire imaging pipeline, Process Zero captures a single frame with minimal intervention. No Smart HDR. No Deep Fusion. No aggressive sharpening.
Foundry
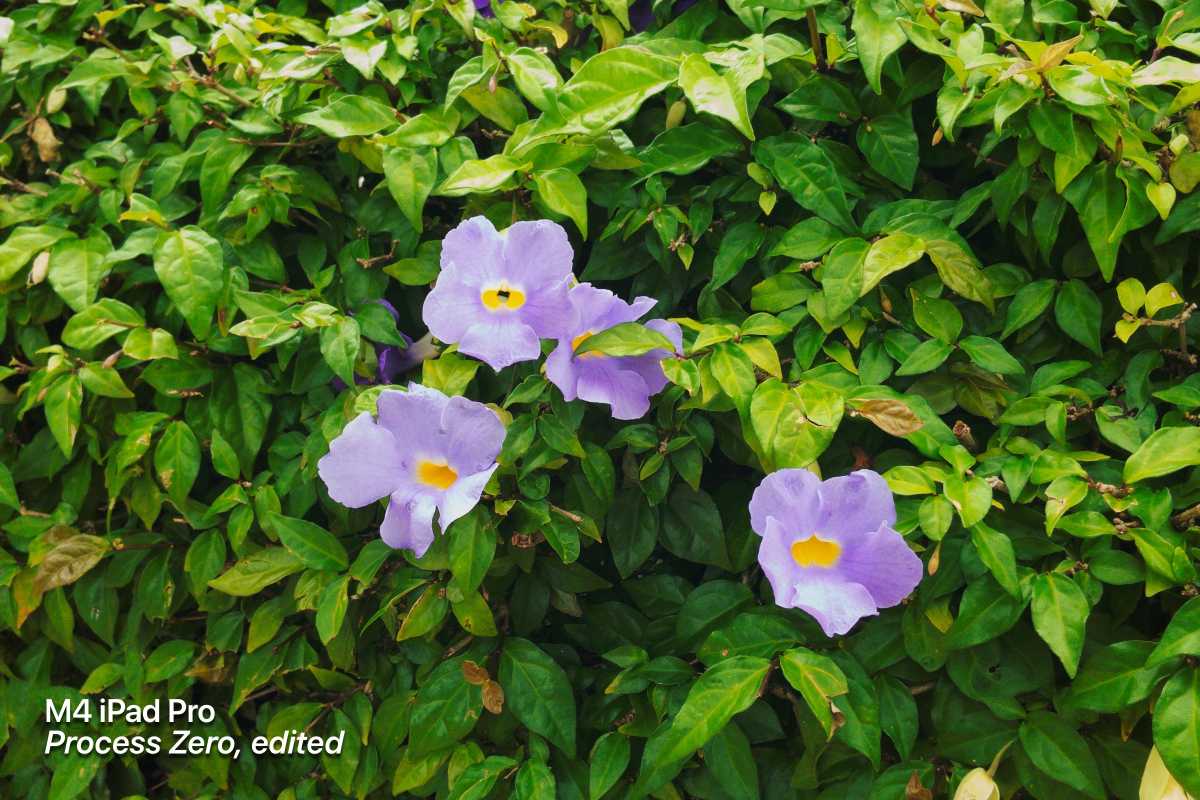
At first glance, photos taken with Process Zero don’t stand out as much as typical iPhone photos usually do. They’re flatter, grainier, sometimes darker, and definitely less vibrant. But they look more like a photo you’d take with a good old analog camera.
Highlights behave the way you expect. Bright skies can actually blow out instead of being artificially toned down. Shadows stay dark instead of being lifted into a gray haze. Colors are more restrained and more accurate.
And most importantly, textures look more natural. Skin doesn’t have that over-sharpened, processed look. Fine details aren’t exaggerated.
Foundry
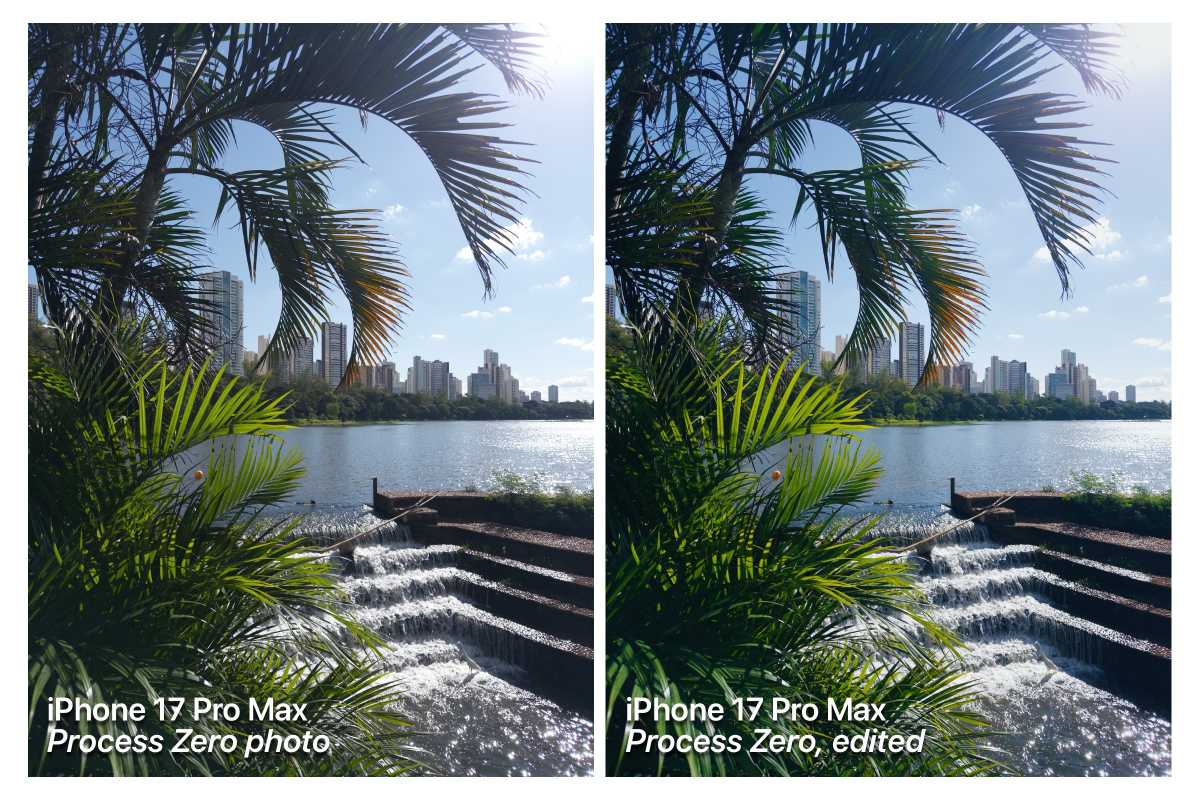
One unexpected benefit of shooting this way is how much more enjoyable editing becomes. Instead of worrying about correcting the iPhone’s decisions, I now edit a neutral image to give it the look I want. Personally, I love using the Darkroom app to edit Process Zero photos.
Foundry
There are other iOS apps that also let users take photos with no processing, such as Zerocam and Moment.
Make older iPhones feel new again
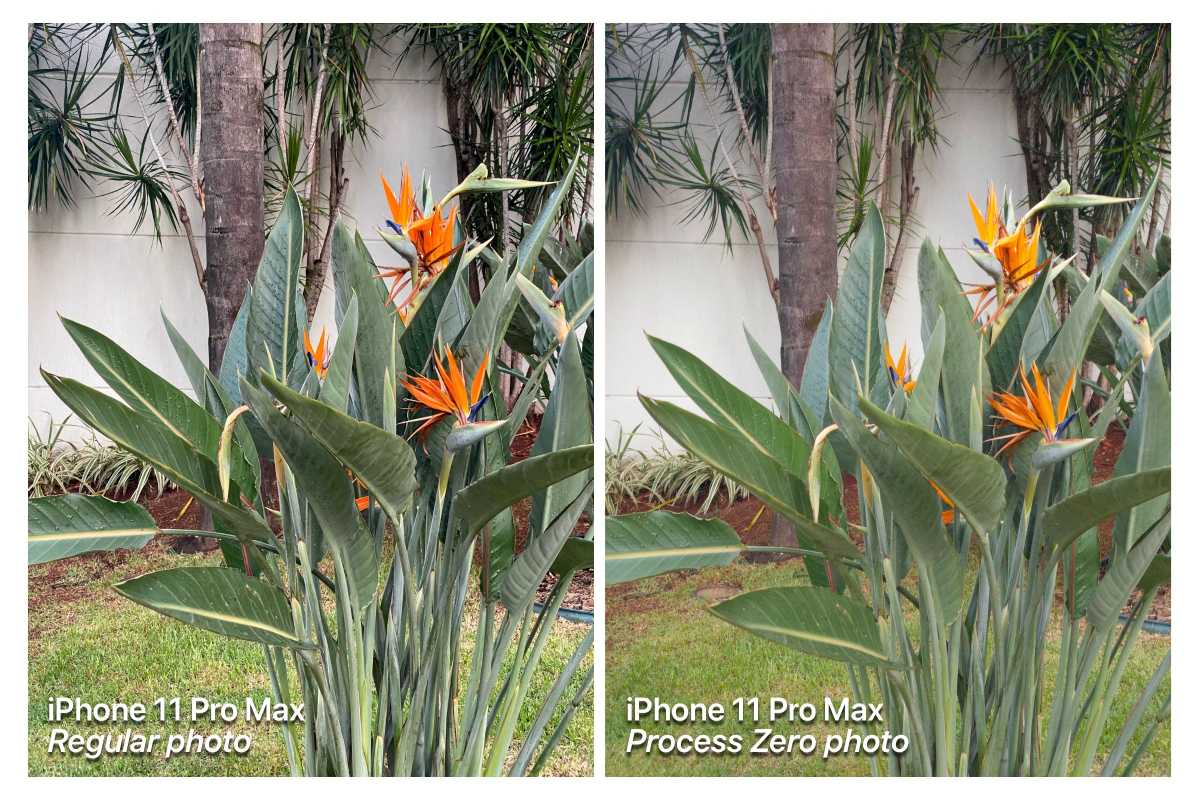
One thing I’ve learned since I started taking photos with no post-processing is that this technique can also breathe new life into an older iPhone, or even an iPad.
Here’s an example of a Process Zero photo I took with an iPhone 11 Pro Max, compared to a photo from the Camera app. You can see that the sensor is still quite capable of taking good photos without all that unnecessary post-processing.
Foundry
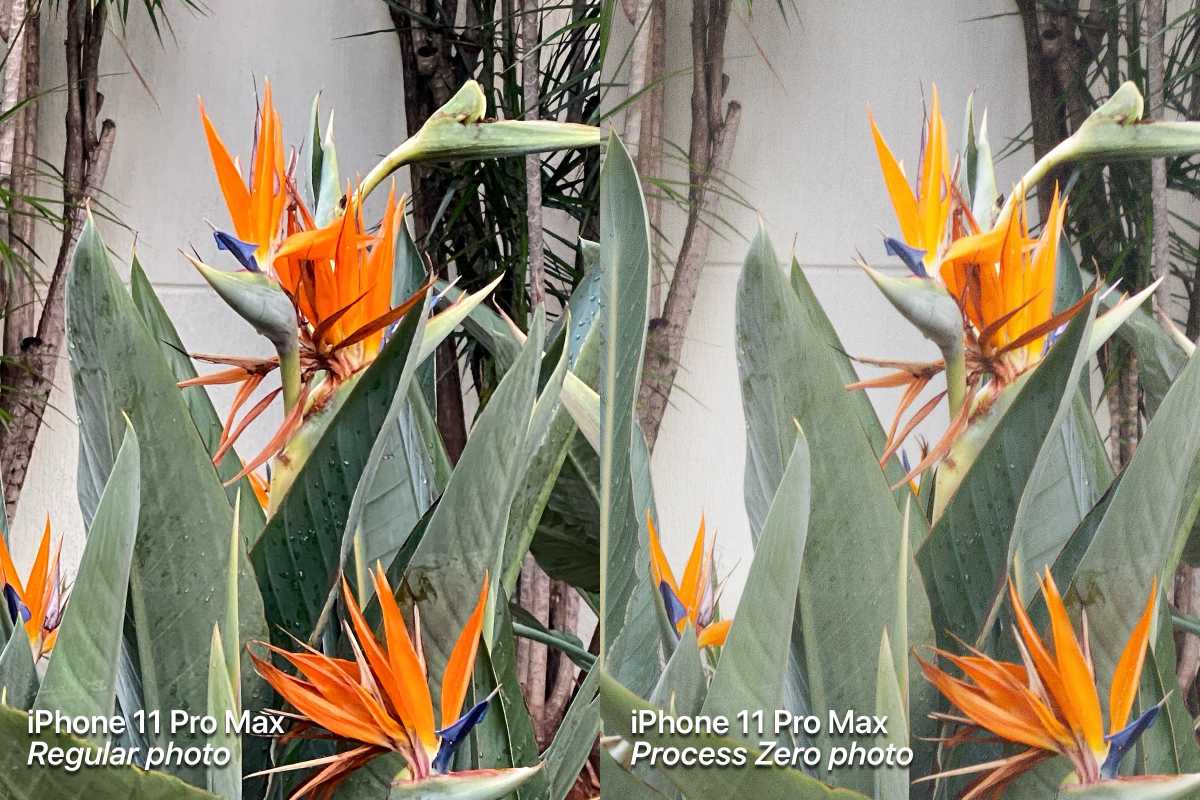
If you take a closer look at the details, you can see how the image from the Camera app is unnaturally sharp.
Foundry
You can actually take some great photos with your iPad (just don’t be that person who takes photos with an iPad at a concert or event). Without heavy processing getting in the way, the results are surprisingly usable.
Foundry
Yes, there are some trade-offs
Of course, there are some trade-offs when you choose to take photos with zero processing using third-party apps.
Photos taken in low-light conditions will look extremely grainy and the dynamic range is more limited. In addition, you lose features like Live Photos. For those who just want to snap a quick photo to share, the default Camera app is still much more convenient.
Apple’s processing exists for a reason. It makes photography effortless for most people. But if you care about how your photos actually look, those trade-offs start to feel unacceptable.
An option in between
If you don’t want to buy a third-party app for taking photos or still want some computational photography features, there’s an alternative in between.
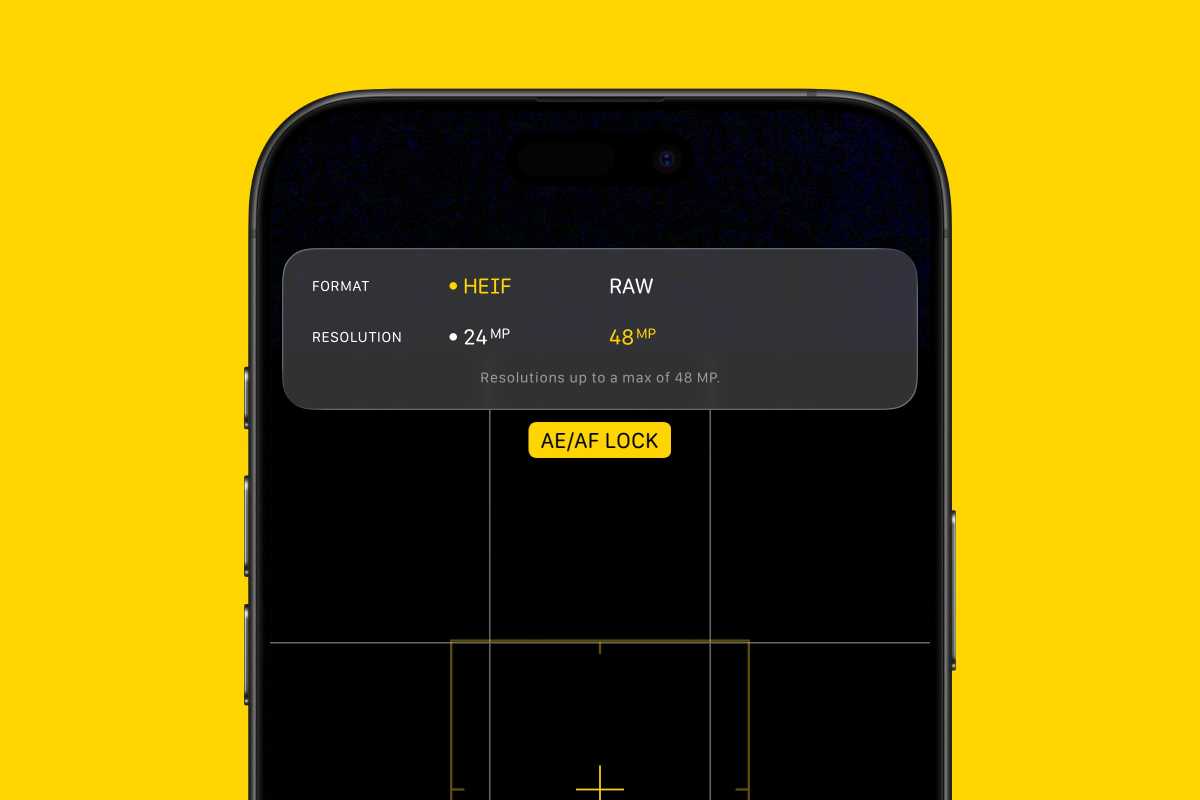
If you have an iPhone 14 Pro or later, you can try taking HEIF photos at 48 megapixels. This will make the iPhone save your photo with slightly less compression and processing at the sensor’s full resolution, while still preserving features like HDR.
Foundry
To do this, open the Camera app on your iPhone and tap the “HEIF 12” button in the upper-left corner of the screen. Change the settings to the HEIF 48MP option. This feature is only available on iPhones with a 48-megapixel camera (such as the 14 Pro, or the 15 and later).
A better way to use the iPhone camera
For me, switching away from Apple’s default image processing completely changed how I use the iPhone camera.
I take fewer photos, but I care more about each one. Instead of relying on the iPhone to fix everything, I pay more attention to light and composition. Things that actually make a good photo. And when it comes time to edit, I’m working with an image that feels natural.
The iPhone still has one of the best camera systems in any smartphone. But if you’re not happy with how your photos look lately, the answer might not be upgrading your hardware. Instead, you should try a new way of taking photos using different software.


