A while I back, I wrote a column for TechHive on ways to rent or buy DVDs without Netflix’s now-dead DVD service. So it’s only fitting to now write the opposite story, about how to declutter the optical media you no longer want.
First, we’ll go over some ways to digitize any DVDs or CDs you want to save, using freely available software. We’ll also cover how to sell discs in bulk for a modest profit.
This story is adapted from Jared’s Advisorator newsletter. Sign up to get more tech tips every Tuesday.
Why digitize?
In an age of streaming abundance, you might not think digitizing physical media is worthwhile. Allow me to offer a few counterpoints:
- Not all physical media is available on streaming services (or available on the ones you currently pay for). With a digital copy, you can access that content on all your devices without any clunky optical drives.
- Digitizing allows you to preserve the content’s original quality without the extra compression that often comes with streaming.
- If you have the time and inclination, running a personal media server is a fun and rewarding hobby, one that will let you access all your digitized content from anywhere without any ongoing subscription fees.
Get a disc drive
LG
Unless your computer has an optical drive built in, you’ll need an external player to plug in over USB. For DVDs and CDs, I use an LG drive similar to this one, which I bought on sale for $20, but Amazon has generic models at similar prices.
The situation’s more complicated if you’re ripping Blu-rays. Low-end Blu-ray drives start at around $60 but can’t play 4K discs at all. Ripping 4K Blu-rays requires specific hardware and third-party firmware to circumvent copy protection, and probably isn’t worth the trouble unless you’re fully committed to the endeavor.
Digitizing a CD
Jared Newman / Foundry
My go-to for digitizing CDs is a free program called fre:ac, which is available for Windows, Mac, and Linux.
After installing fre.ac, just insert a CD into your drive, open the app, and wait for the album info to load. (You can also click the CD icon with a plus sign next to it.) The software automatically pulls in data from CDDB, so it should pull in track info for all but the most obscure albums.
You’ll have to provide album art on your own, though. Download some from Google Images, then head to the “Tags” tab in fre:ac. Click “Album” underneath, select “Add” under the “Cover Art” section, and select the image you downloaded.
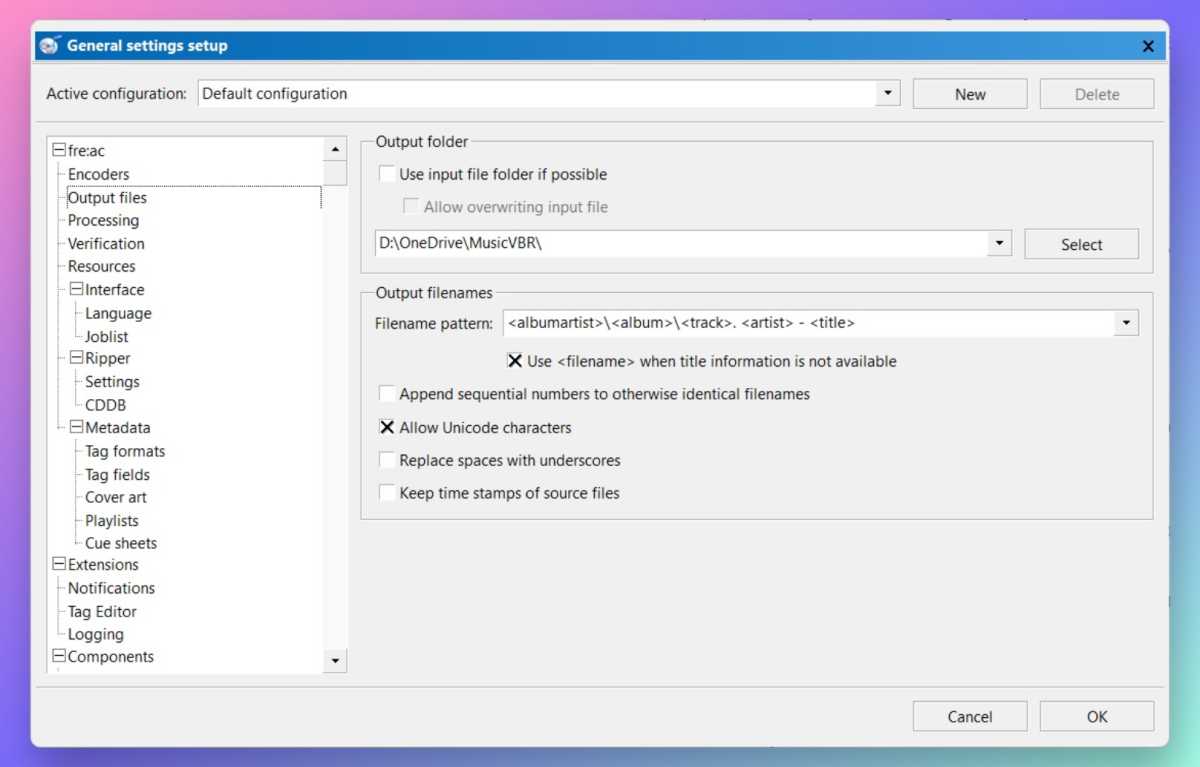
Next, head to Options > General Settings > Output files. From here you can choose where to save your audio files and customize folder and file names.

Jared Newman / Foundry
Once everything’s configured, you can rip the album into a wide range of formats, which you can view by clicking the drop-down arrow next to the ?? button in the top toolbar. I suggest FLAC to preserve the CD’s original quality, or either MP3 or AAC if you want much smaller files in exchange for a loss in quality. Click the play button itself to start ripping.
More tools to check out: The fantastically named MusicBrainz Picard can automatically add album art and track info based on the audio file’s unique characteristics. I also like MP3Tag for tweaking track info in bulk, but it’s only free for Windows users. The Mac version costs $20.
Digitizing DVDs

Jared Newman / Foundry
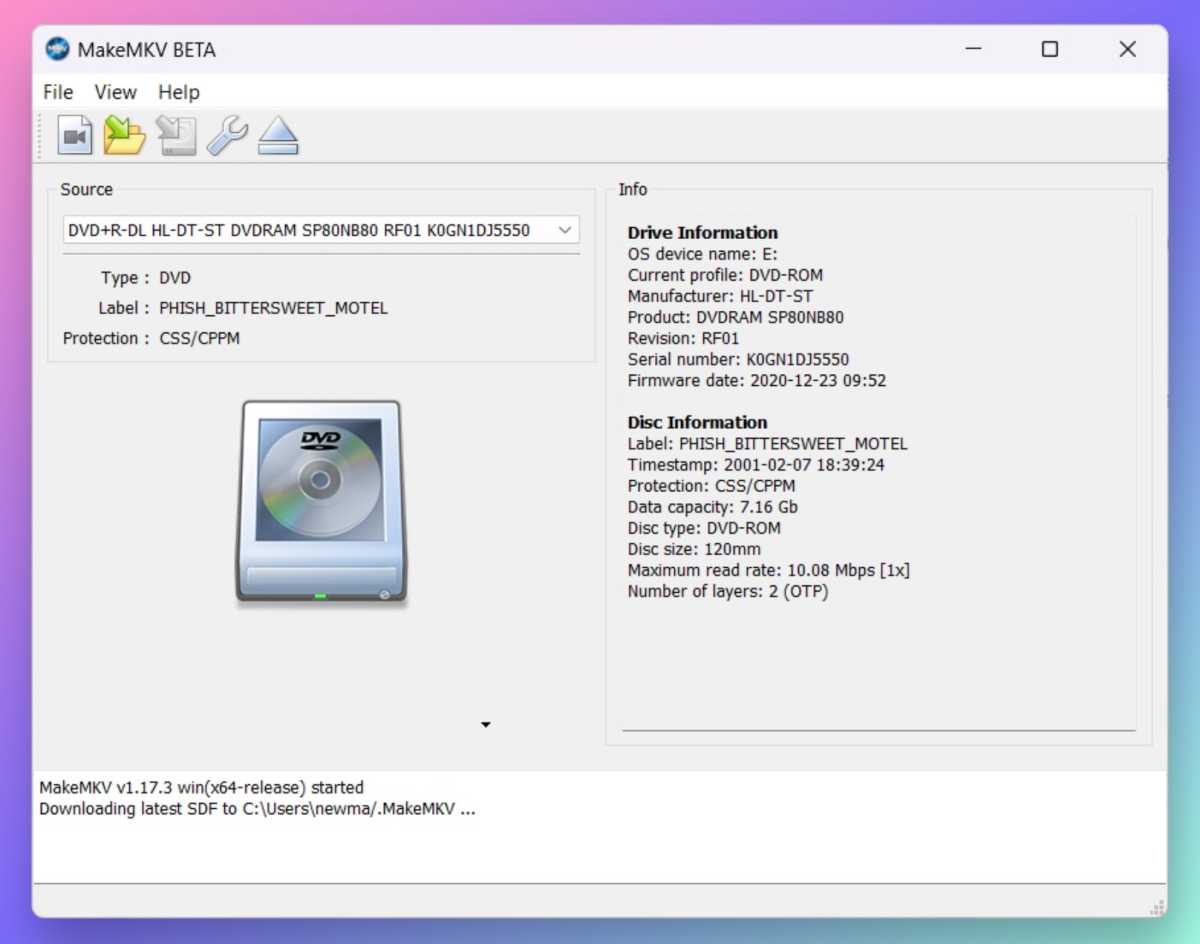
Ripping DVDs is a simple affair with a free program called MakeMKV. With just a few clicks, it can convert your discs to the MKV file format. (Just be aware that if the DVD is copy-protected, ripping it is probably illegal.)
To get started in MakeMKV, just click the big disc icon and wait for the app to scan your disc’s contents. On the next screen, choose where to save your files. Click the little green arrow icon under “Make MKV,” then sit back and wait.
You’ll end up with one or more MKV files depending on the number of extras and deleted scenes included with the disc. Rename them in a way that’s recognizable, then gather them all into a single folder. (If you’re adding them to a Plex server, there’s a specific naming scheme to follow for bonus content.)
Note MakeMKV can also rip Blu-ray discs. It technically requires a $60 license after 30 days, but free license keys are available once per month while the software is in beta, as it has been since 2008.
Need smaller files? DVDs can easily eat up 5GB of storage space when ripped via MakeMKV, so consider using Handbrake to compress them down to a smaller size. The “Super HQ 480p” preset for DVDs should cut things in half without a noticeable drop in quality.
How to sell unwanted DVDs and Blu-rays

Jared Newman / Foundry
First, a disclaimer: If you just ripped a copy of a CD or DVD for personal use, you’re probably not allowed to turn around and sell it while keeping the digital version for yourself. For the purposes of this guide, I’m just going to assume you have a separate stack of discs that you’d like to get rid of, even without digitizing them first.
While you can always look for a local record store to sell your CDs, or try to sell everything in bulk on eBay, the appropriately-named Decluttr is a much simpler solution.
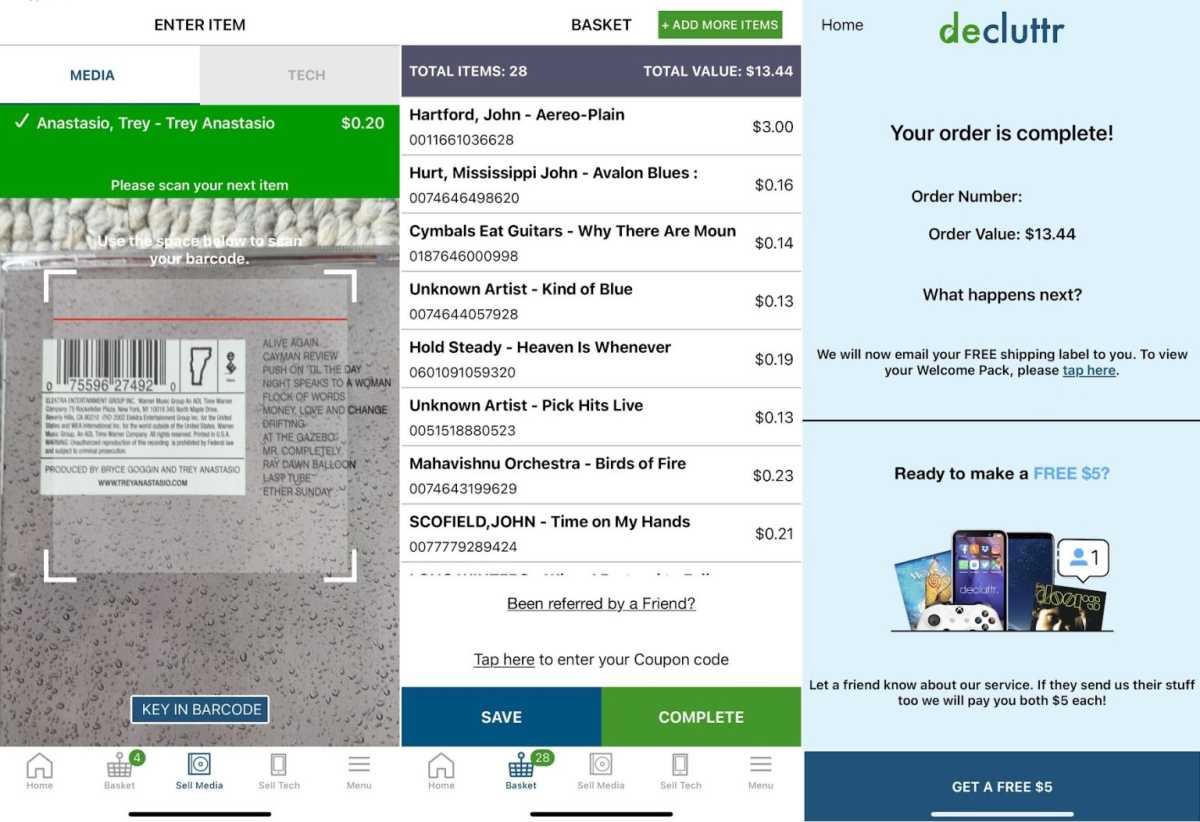
Download Decluttr’s app for iOS or Android, and you can scan the barcodes for all your CDs, DVDs, and Blu-rays. Decluttr will pay cash for each one and provides a free UPS label (or even multiple labels, if need be) to ship them out. You only need to provide the box in which to send them.
Admittedly, this isn’t the most economical way to offload old discs. I scanned 28 CDs and one DVD into the app, and the offers for each disc ranged from $0.10 to $3, with a total payout of $13.44. On a separate occasion, I scanned 37 for a meager $7.44.
But as motivation to finally get a stack of CDs out of my office, it’s enough, and I take some comfort in knowing that Decluttr will try to find a new home for them. Now I’ll be on the lookout for dusty CD towers at friends’ and families’ houses to see if we can offload any more.
Sign up for Jared’s Advisorator newsletter to get more tech tips every week.
