Beta testers have been exploring the features in iOS 18 for some time now, having raced to install the beta on their iPhones as soon as it became available. Testing the beta of iOS 18 gave testers a glimpse of what was to come in iOS 18 and bragging rights when it came to exploring the new features.
Soon iOS 18 will be here, so, if you hadn’t tried the beta already, you might be thinking of giving it a go. But running a beta can have more risks than benefits, and if it messes up your phone, the process of downgrading from the iOS 18 beta to iOS 17 (detailed below) isn’t simple.
Once iOS 18 is out beta testers may decide to move on from the bugs and enjoy the tried and tested features. Luckily switching from the iOS 18 beta to the full version of iOS 18 once it launches is a lot easier than before the new software launches.
If the buggy beta of iOS 18 becomes more trouble than it is worth here’s how to remove it and install the full version of iOS 18 when it arrives, or to revert back to iOS 17 if you’ve had enough of iOS 18 for now.
How easy this process is depends at what stage of the beta testing phase you are. We’ll start with downgrading the beta of iOS 18 to iOS 17, before discussing removing iOS 18 beta to install the final version and leaving the beta program.
How to downgrade from iOS 18 beta to iOS 17
During the pre-release testing of iOS 18 beta downgrading from the iOS 18 beta to iOS 17 requires you to completely wipe your iPhone and then reinstall iOS 17. If you just wipe your iPhone and restart it will still be running the iOS 18 beta.
This is what developers will need to do to revert to iOS 17 from iOS 18 beta:
Restore the iPhone and reinstall the pre-beta iOS via the Finder
Foundry
Generally downgrading from the beta and installing a full version of iOS should be easy enough and the stops below will work. In the early stages of the beta you may find that the software is too buggy though, in which case you may have better luck if you restore your iPhone to factory settings first – as per the steps further down this article.
- Download the correct version of iOS for your iPhone from IPSW.me. It needs to still be signed by Apple, so you will only be able to choose the current full version of iOS.
- Open the Finder on your Mac. (Or iTunes on a PC).
- Plug in your iPhone.
- If you haven’t done so, you will need to turn off Find My on your device. Go to Settings and click on your ID information. Tap Find My > Find My iPhone and switch the slider to off. Enter your Apple ID password.
- Hold down the Option/Alt key and click on Restore iPhone. This should allow you to select the version of iOS you wish to install on the iPhone from your downloads folder, locate it and click on Open.
- A message will appear saying which version of iOS you will install. Click to confirm this and wait while your iPhone is restored.
Your iPhone will be set up as a new device, so you will either need to get your hands on a backup or sync the data you want on your iPhone, we’ll explain what to do next below.
Restore your iPhone using an iCloud backup
Foundry
Now you have wiped your iPhone and reinstalled the non-beta version of iOS, you can get on with the process of recovering it from a backup prior to your beta adventure if you have one. Note that if the backup was made since the beta was installed you will reinstall the beta at this stage!
You may be able to locate and use an older backup or a backup from a different device – check which version of iOS the backup is in by tapping on it.
If you don’t have a usable backup you may still have a fair amount of your data available to you if you use services like iCloud Photo, Messages in iCloud and iTunes Match or Apple Music. Our How to back up an iPhone or iPad tutorial runs through what is and isn’t included in the backup.
- Swipe up from the Welcome screen on your iPhone.
- Tap on your language and select your country or region.
- Click on Set Up Manually.
- Work through the various steps until you get to the Transfer Your Apps & Data screen and tap on From iCloud Backup.
- Log into your Apple ID and wait while your device signs in.
- Now choose an iCloud backup from before you downloaded the beta. Click on Show More Backups to find an older one if you don’t see it. Unsure, tap on the device to see which version of iOS the backup was made in.
- Wait while the Restore from iCloud takes place, which could take a while.
If that doesn’t work, wipe the iPhone using Recovery Mode first

Foundry
If the straightforward method above doesn’t work, in order to reinstall iOS 17 on your iPhone after you have been running the iOS 18 beta you may need to restore your iPhone to factory settings using Recovery Mode.
To do this you will need to use the Finder on a Mac (or iTunes on a PC).
- Plug your iPhone into the Mac (or PC).
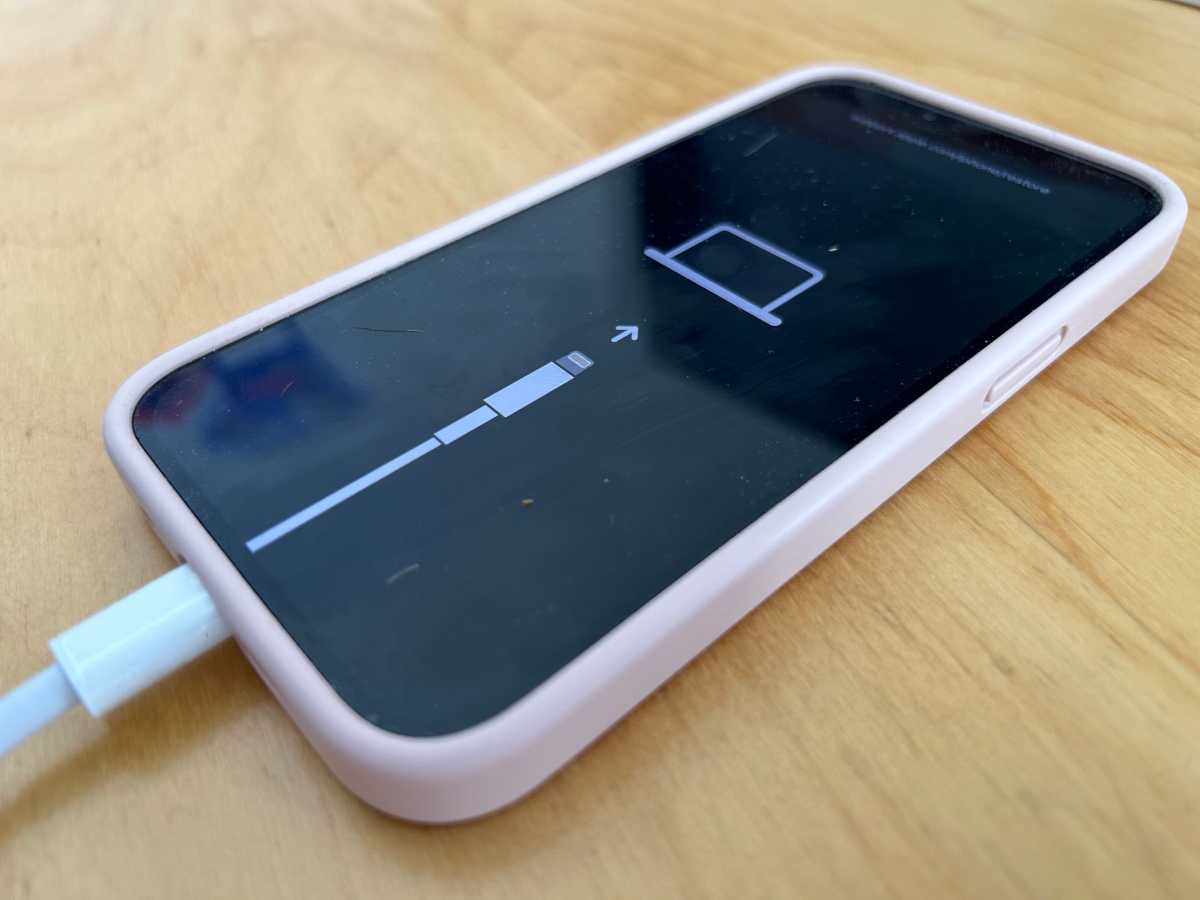
- You will need to put your iPhone into Recovery Mode. To do so press the up volume and down volume in quick succession, then the side button but keep pressing the side button until you see the image above of a cable and laptop (expect it to take a while).
- Once your iPhone is in Recovery Mode, on your Mac or PC click on Restore, but at the same time press the Option/Alt key. This will allow you to locate the version of iOS 17 you just downloaded from IPSW.me, as per the steps above.
- Wait while your iPhone is wiped and the older version of iOS is installed.
How to switch from iOS 18 beta to iOS 18 once it launches
Once iOS 18 is here it will be easy to update to that from the beta. Here’s how:
- Go to Settings.
- Go to General on your iPhone.
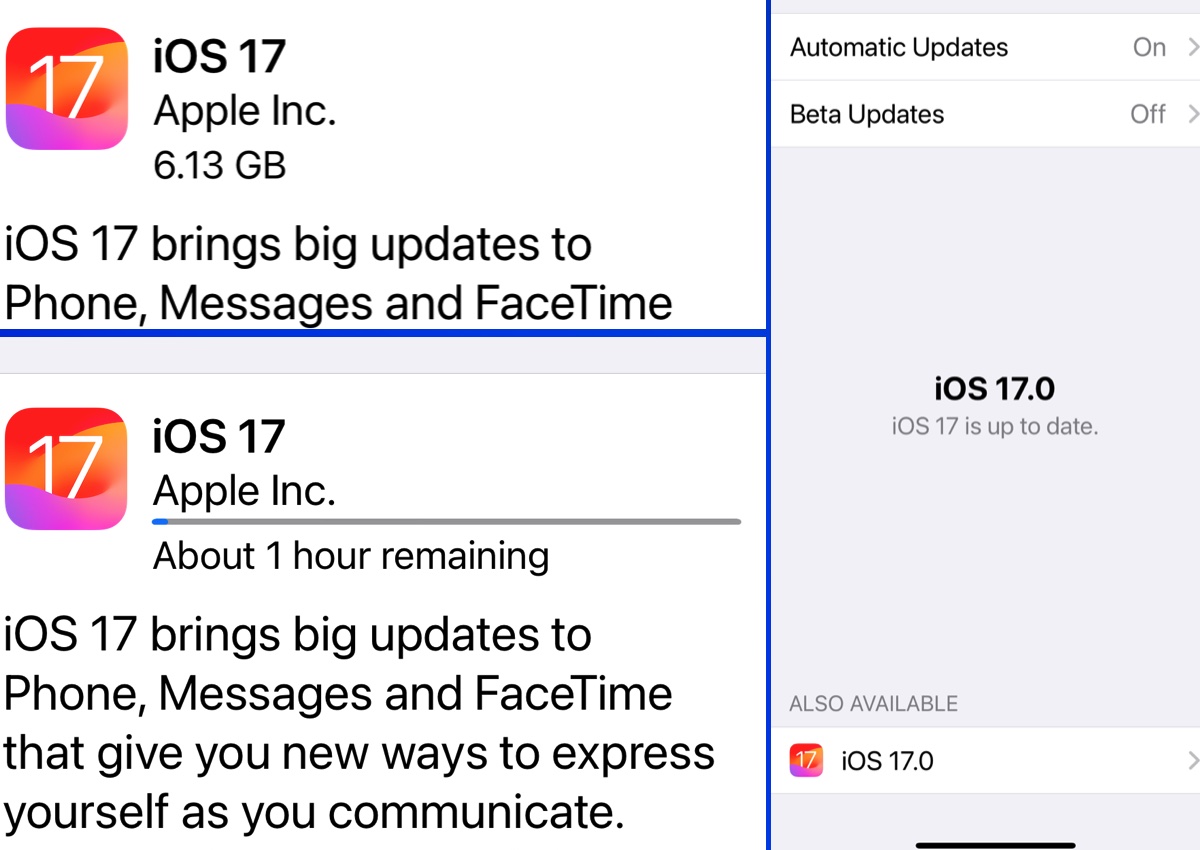
- Tap on Beta Updates and switch it to Off.
- Tap Back. If you have the beta installed you will see iOS 18.0 is up to date, however, at the bottom of the screen you will also see Also Available iOS 18.0.
- Tap Update Now.

Foundry
You will find more information below on how to leave the beta program and stop getting beta updates, which you may want to do now the full version has arrived.
We run through How to downgrade an iPhone to an older version of iOS in a separate story.
How to leave the beta program
If you want no part of the iOS beta program you can remove your device from it. That way you won’t be able to see any Beta updates, and won’t be tempted to install them.
To leave the iOS beta program, follow these steps on your iPhone:
Remove your device from the iOS beta program.
- Sign in.
- Click Leave Program.
If you ever decide you want back into the beta program–like when the iOS 19 public beta arrives, for instance, you can head over to the Apple Beta Software Program site and re-enroll your device. Read more about how to be a beta tester here: How to join Apple’s beta program and try out new software.
How to stop getting iOS Beta updates
You don’t have to leave the beta program though, you could just turn off Beta Updates so that you don’t receive them on your device.
Once the final version of iOS 18 arrives Apple will continue to issue beta updates as it works on new features. But now that your iPhone has a stable release of a shiny new operating system, you might not want to keep up with the betas anymore. It is easy to stop getting beta updates and just use the final version.
- Open Settings.
- Tap on General.
- Tap on Software Update.
- Tap on Beta Updates.
- Tap on Off.
- Tap on Back.
Now you’ll only receive software updates when Apple pushes them to the general public, roughly once every six weeks. You can still see that there is a beta update, but your iPhone won’t volunteer to download them unless you switch Beta Updates back on by following the steps above.
How to remove a Beta Profile
Prior to iOS 16.3, the process for removing an iOS beta was different.
- Head over to the Settings app.
- Tap General.
- Tap on VPN & Device Management.
- Select the iOS Beta Software Profile that appears.
- Tap Remove Profile.
- Enter your device password.
- Tap Remove a second time to confirm.
- The iPhone will now need to restart.
We also cover How to remove macOS beta from a Mac.


