Do you, like me, have paper documents that have long since been scanned and processed, records or music cassettes that you would like to listen to on your mobile phone, and photo prints that are planned for a digital photo book?
Then you will appreciate the two-step instructions in this article, with which you can convert analog media to digital and then process them further.
Scan documents and have text recognized
Important insurance papers, contracts, invoices, or simply the page-long letter from your favorite aunt — there are many paper documents that you want to scan in order to preserve them.
If it’s even a text that you want to search and edit, you can run OCR software over it after scanning, which recognizes the text so that you can search it and, if necessary, edit it with a standard word processor.
Step 1: Scan documents
With the freeware Not Another PDF Scanner 2 (Naps 2), you have plenty of options for editing and saving the scan after scanning a document. The tool is also very easy to use.
IDG
To digitize a paper document, you need a scanner and the corresponding software. The scanner can either be a combination printer with a scan function or a standalone device that can only scan.
If you need to scan a lot of documents, you can also opt for a dedicated document scanner from Ricoh’s Scansnap family, for example. Depending on the model, these devices cost from around $350, are designed for high throughput, and are also capable of duplex scanning.
If, on the other hand, you don’t have the space for a combination printer and only need to scan individual pages of text occasionally, a mobile scanner such as the Brother DS-640 for around $100 is suitable.
However, a scanner alone does not make a scan. You also always need scanning software or the scanner driver. This is usually supplied with the device and offers more or less settings with which you can influence the scan result, including the resolution, the output directory, and options for duplex scanning, if a device supports this.
If the driver options are not sufficient, you can also use third-party software. We recommend the open source program Not Another PDF Scanner 2, or Naps 2 for short.
The tool works with the devices of all major manufacturers and offers an OCR (Optical Character Recognition) function as a special feature — i.e. it can recognize scanned text. But more on this in step 2.
To use Naps 2, first create a profile for your scanner or combination printer. To do this, click on Profiles > New > Select device and then on the product name, then click twice on “OK” and “Done.”
Scan the desired document and double-click on the preview. You now have the option of rotating the scan, cropping it, adjusting the brightness, contrast, hue, and color saturation using the slider, converting it to black and white, and sharpening it.
Once the corrections are complete, save the scan as a PDF or image, whereby BMP, GIF, JPG, PNG, TIF, EMF, and Exif are available for selection and you can also make further settings.
Step 2: Recognize text
As already mentioned, Naps 2 offers you the option of running text recognition on the scanned document after each scan. In the “Optical text recognition” menu item, select the language of the document, the OCR mode (Fast, Best, or Legacy), whether the recognized text is searchable, and whether the OCR should be activated automatically after each scan.
German and English are already pre-installed for the document language, other languages can be added free of charge via a download link.
Attention: Naps 2 cannot output and save the scanned text as a text file! If you want to edit the text, save the scanned document as a PDF, open it in a PDF viewer, and then copy the text into a word processor using “Select all” and “Paste.”
The free PDF24 Creator has an integrated OCR function that reads text in PDF files so that they can be searched later. It also outputs the texts as a TXT file for editing if required.
IDG
Alternatively, you can also use PDF24 Creator and call up the integrated text recognition via the “Open PDF24 OCR” button.
Select the desired PDF via “Add files” and start the OCR with “Start.” Once complete, click on the three horizontal lines next to the PDF and on “Show recognized text.” A TXT file opens with the recognized text, which you can adapt and save as required.
Digitize and optimize photos
If you still have paper prints of photos sorted in albums or lying around loose, you can photograph them very easily, but also laboriously with your smartphone.
If you only want to digitize slides or negatives, you will find what you are looking for in Kodak’s Slide-N-Scan range. The devices are available with or without a display and support film formats of 135, 110, and 126 millimeters.
Of course, photos can also be scanned using the scan function of a conventional combination device. There are also scanning programs with integrated image processing that are particularly suitable for scanning paper prints.
Step 1: Scan photos

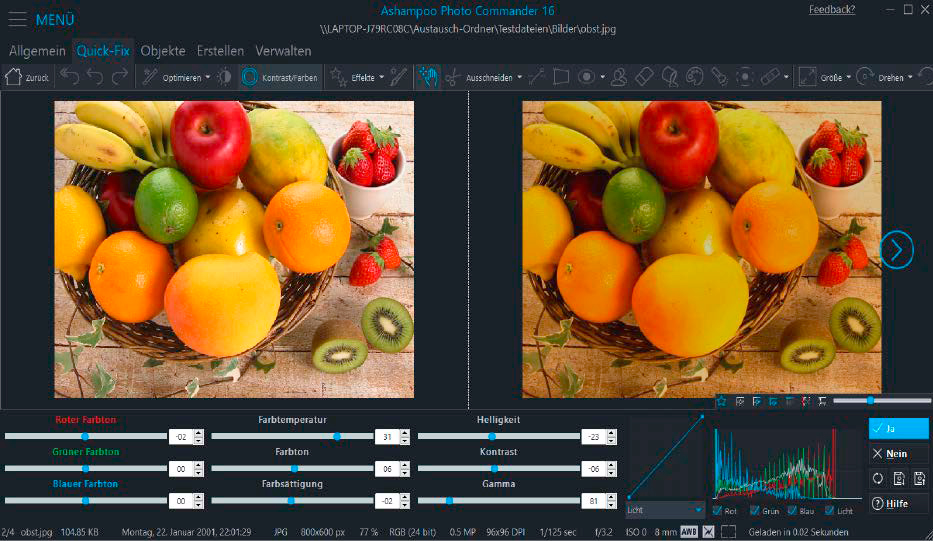
Photo Commander 16 from Ashampoo lets you scan paper prints in conjunction with a scanner and also has basic editing tools on board.
IDG
Ashampoo Photo Commander 16 is the perfect software for scanning and editing photos.
After installation, click on the three horizontal lines and then under File > Scan/Import > Scan photo. Select your scanner or the combination device, specify the output format — here you can choose between PNG, JPG, PDF, and Multipage PDF — and the folder in which the images are to be saved. Click on “Scan” to start scanning.
Step 2: Optimize images
If you would like to edit your scanned images with Photo Commander 16, you will find various options in the “Edit” menu, some of which you can also access via the navigation bar:
- With the “Quick Fix Tools” you can optimize contrast, colors, and white balance, remove image noise in three stages and straighten an image.
- A soft focus, red-eye remover, clone stamp, and eraser are also available.
- Under “Edit objects” you can add text and shapes, while “Modify” adjusts the image size and the canvas.
- Last but not least, you have the option of influencing the color depth, applying blurring, and editing an image with regard to the color channels.
By the way: You can customize the appearance of the program under “Configuration” and “All settings.” For example, unchecking “Modern app menu” under “General” makes the interface much clearer and easier to use.
Digitize records and manage music
Music enthusiasts still rave about the atmospheric crackling of a record compared to the sterile sound of a CD. If you want to enjoy the crackling sound on your mobile device, you should convert your records to digital.
Step 1: Digitize vinyl records
There are various ways to connect a record player to your PC. If the device has a USB port, simply connect it to the computer as usual using a USB cable.
However, if the record player has a different audio output, such as line-out via cinch, jack, or similar, the PC should have a suitable line-in connection.
You will also need the appropriate audio cable (such as RCA to RCA, RCA to jack, or jack to jack) to connect the two devices together. Make sure you use the correct connector type, i.e. TS for mono or TRS for stereo signals.
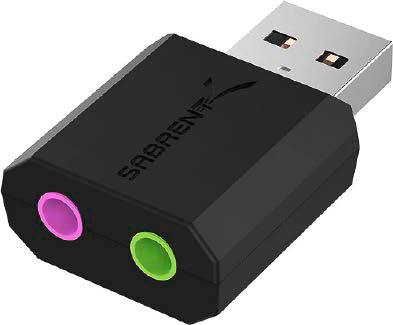
If your PC does not have a line-in socket, you can also use the microphone input, or — especially recommended for notebooks that do not have audio inputs — you can get a USB adapter with microphone and headphone connection, which is available from Amazon from $9. They usually also provide better sound quality than the built-in onboard sound chips on the motherboard.

Especially with notebooks that do not have audio inputs, you can retrofit audio sockets for little money with a USB adapter. The adapters are actually intended for connecting headsets.
IDG
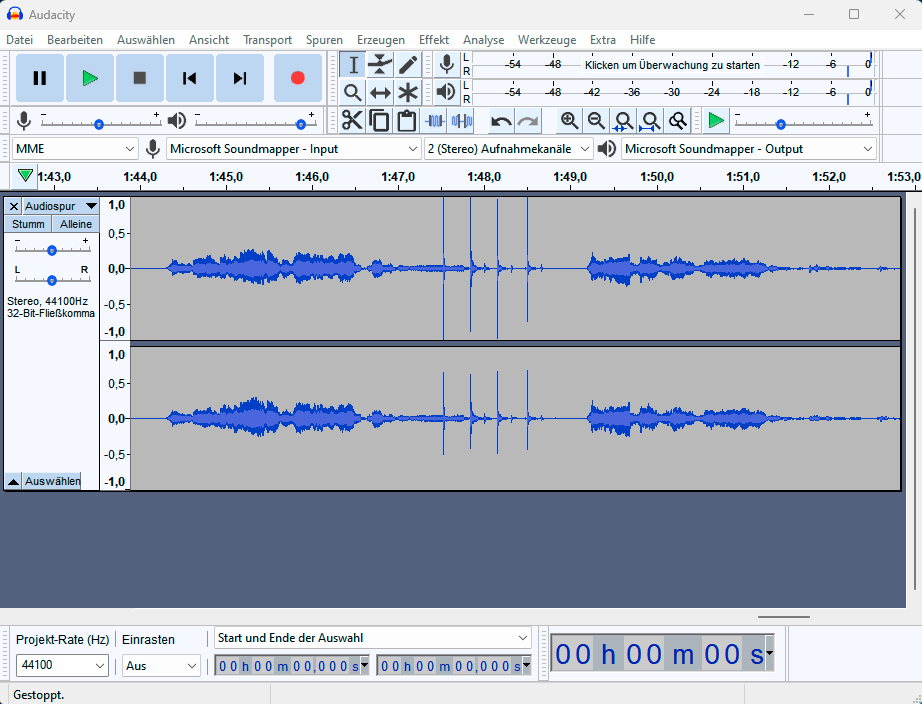
In addition to the hardware connection, you will also need recording software to digitize your records. The freeware Audacity is suitable for this.
You must first configure it after installation: Under Edit > Settings > Devices in the “Playback” and “Recording” sections, select the sound card or the connection on your PC as the “Device.” Alternatively, you can make the selection via the drop-down menus in the main window.
You can also specify under Edit > Settings > Devices in “Recording” under “Channels” whether you want to make the recording in mono or stereo.
If necessary, make further settings under “Quality” and “Directories” if you want to change the default storage folders for saving, opening, importing, and exporting.
If everything is configured correctly, start playback of the record, and simultaneously start digitization by pressing the red button.
Attention: If the sound track in Audacity is cut off at the top and bottom, you must adjust the volume in the program.
To save the file, select the desired format via File > Export, whereby the required library for MP3 is already installed. You can download additional libraries free of charge via the menu item of the same name.

With the freeware Audacity you can digitize records, cassettes, and other analog media, provided you have a playback device and the necessary connections on your PC. You can regulate the level via the volume in the program.
IDG
By the way: Music cassettes can also be digitized in the same way. You need a cassette player with audio or headphone output and the appropriate cable to the PC. Audacity then serves as recording software again.
Step 2: Organize and play tracks
If you have your records in MP3 format on your hard drive, you now need to transfer the data to your mobile device. You can do this with Audials One 2024 Special Edition, for example.
The program is primarily designed to record music, podcasts, and free videos from the internet. However, it can also be used to manage and transfer music.

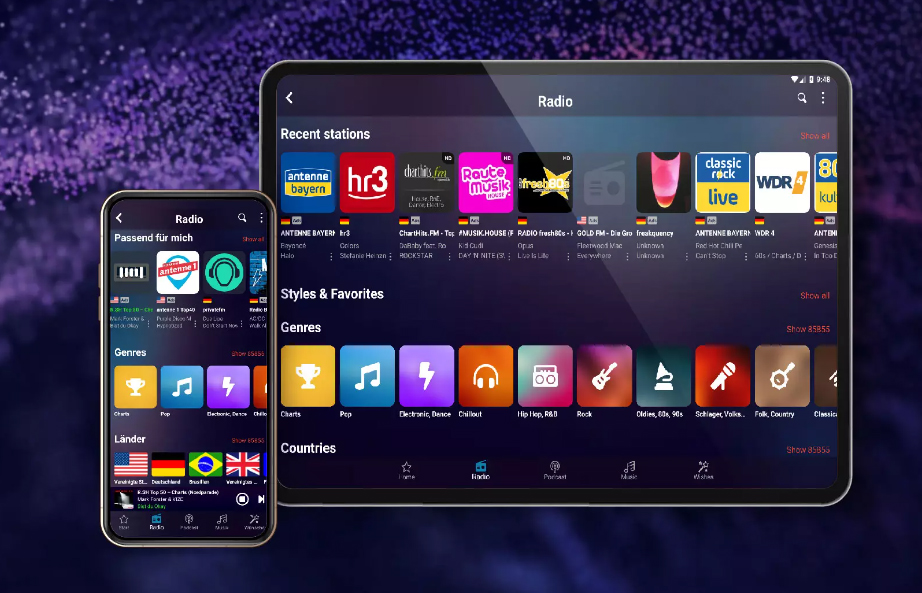
The free Audials Play app gives you access to the music on your PC and you can also download it to your mobile phone. The content of your PC then appears as a separate tab in the app.
IDG
After installation, click on the sheet music symbol in the main view. You will land in the “My music” area, where you can call up the “PC” storage location using the arrow to the right of the lettering. Click on the entry, then on the three dots and “Options.” In the “Additional folders to display” section, click on “Add, music files,” and navigate to the folders with the digitized records. Confirm with “Select folder” and “OK.”
The folders including the audio tracks now appear in the main view of Audials One 2024 SE and can be edited using the pencil icon.
To transfer your music to your mobile device, you will need the free Audials Play Android app. Log in with the same Audials account to which you have registered Audials One 2024 SE.
Then tap on “Music” and switch to the tab that bears the name of your PC. You will find your music there and can download it using the three dots and “Copy to phone.”
This article was translated from German to English and originally appeared on pcwelt.de.


