Virtual Private Networks (VPNs) might sound complicated–they are–but setting one up and using it on your Mac is very easy.
Here, we’ll show you through the entire process of setting up a VPN, step by step, from signing up for a service to installing the software and connecting to a server.
A VPN encrypts the connection between your Mac and the internet and also makes it appear as though you are located where the server is. If you connect to a server in New York, for example, websites and streaming services will behave as though you were in that region, rather than your true location, which could be anywhere in the world.
This is a handy thing to have on your Mac (and iPhone and iPad) if you want to be able to access content that isn’t usually available in your country – e.g. BBC iPlayer if you are in the U.S., or HBO Max which has very little coverage outside the U.S. Plus, if you are concerned about privacy the VPN will encrypt your data and hide your IP address. See: Should I use a VPN on my Mac/iPhone? and for more information on the legalities and whether it is safe to use a VPN read: Is a VPN safe for Mac?
Before you can start using a VPN, you must choose a VPN service to use. NordVPN is our top VPN recommendation, but you’ll find a whole range of alternatives–including many that may be more affordable–in our round-up of the best VPN services for Mac. For the best value VPN right now see our Best Mac VPN deals round-up.
How to set up a VPN on a Mac
Choose a VPN plan
Foundry
Once you’ve decided which VPN service to get, head to its website and choose the pricing plan that suits you best.
NordVPN, which we’re using here, currently offers two-year, one-year, and one-month subscriptions. In the image above the first option is the cheapest, costing $5.29/£4.39 per month for the two years. There might be options that look cheaper, but, after the first year, you could be paying a lot more at which point you might want to cancel and look for a new deal.
You can find the best deal right now on NordVPN’s website. (Nord, as well as other VPNs, often offer deals that offer a lower price per month.)
Create an account and use your preferred method of payment to activate your subscription. Be sure to keep your password and username safe as you will need these.
Download the VPN app
Foundry
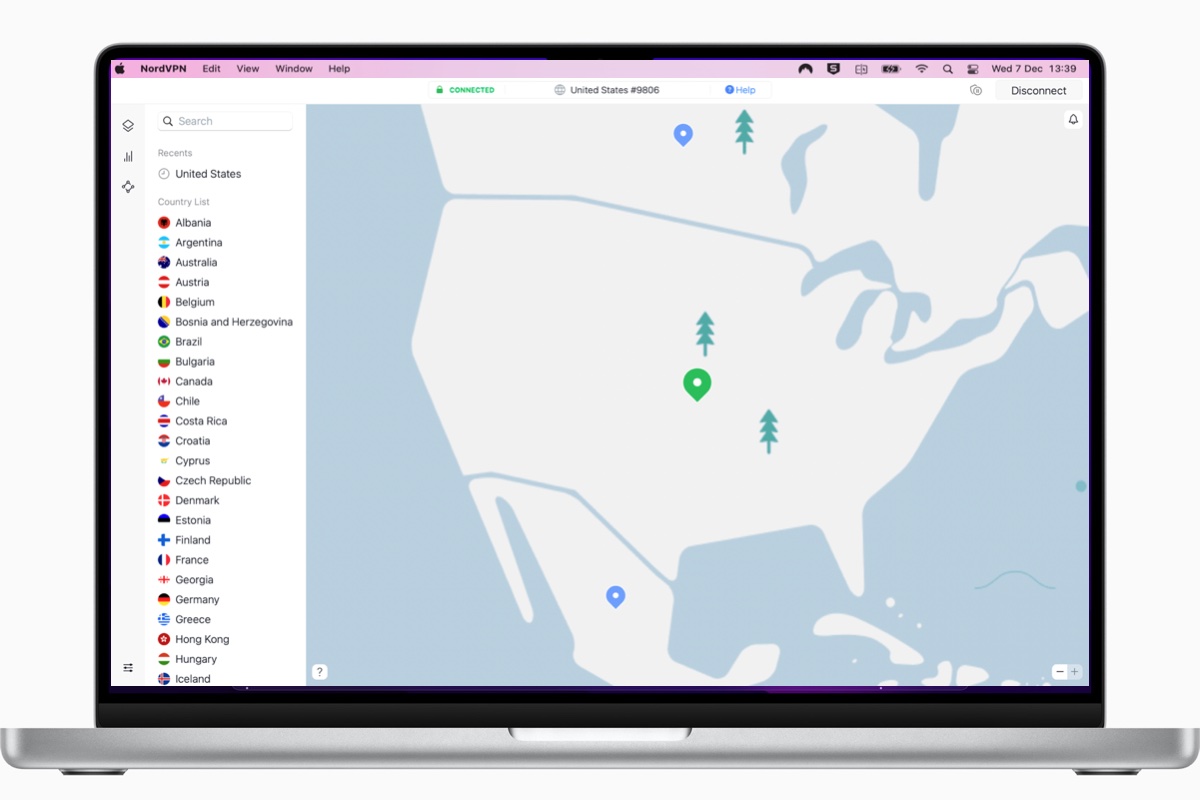
With your account details ready, download the app for your chosen VPN.
On your Mac, you should be able to download via the App Store, which is usually faster and safe, but some VPNs might offer download links from their websites for newer or better-featured versions.
With Nord, the best deals are here. You can download NordVPN from Nord’s website, as well as from the Mac App Store.
Sign in to the VPN app
Foundry
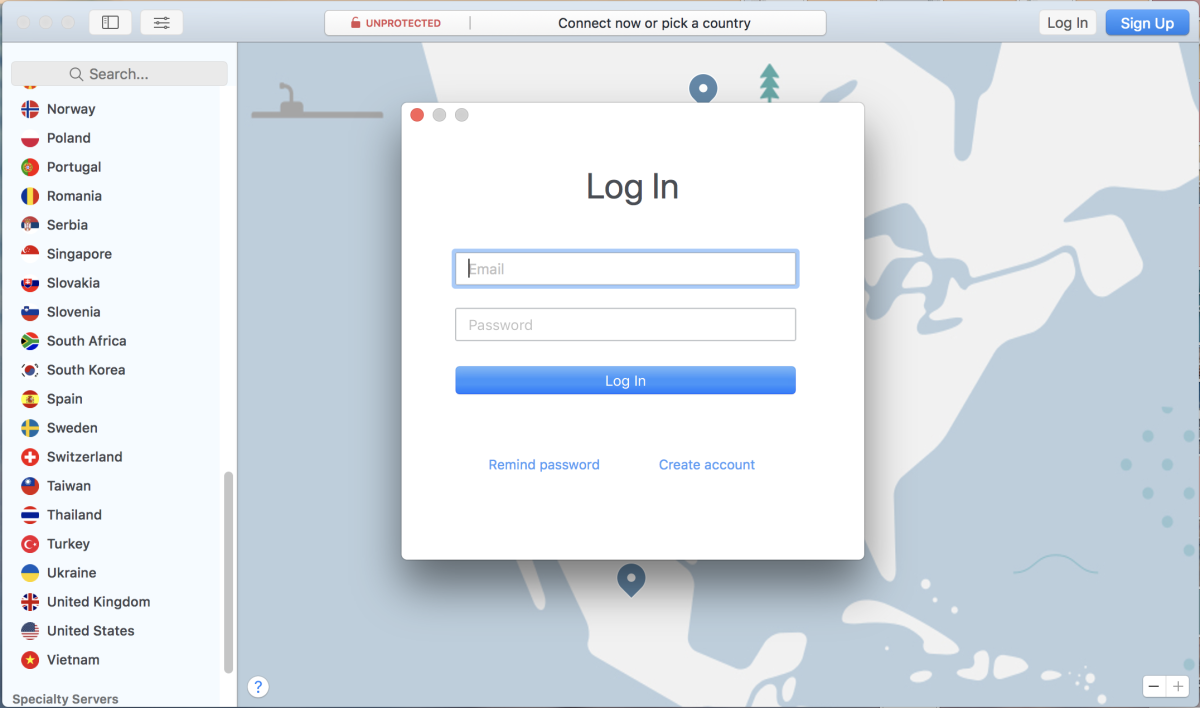
If you choose to download your VPN from the App Store, you may be asked to sign in using your Apple ID after clicking Install App.
Once installed, open the app. You’ll need to sign in using the email address and password from when you created your account earlier (step 1).
Allow the VPN to add configurations
Foundry
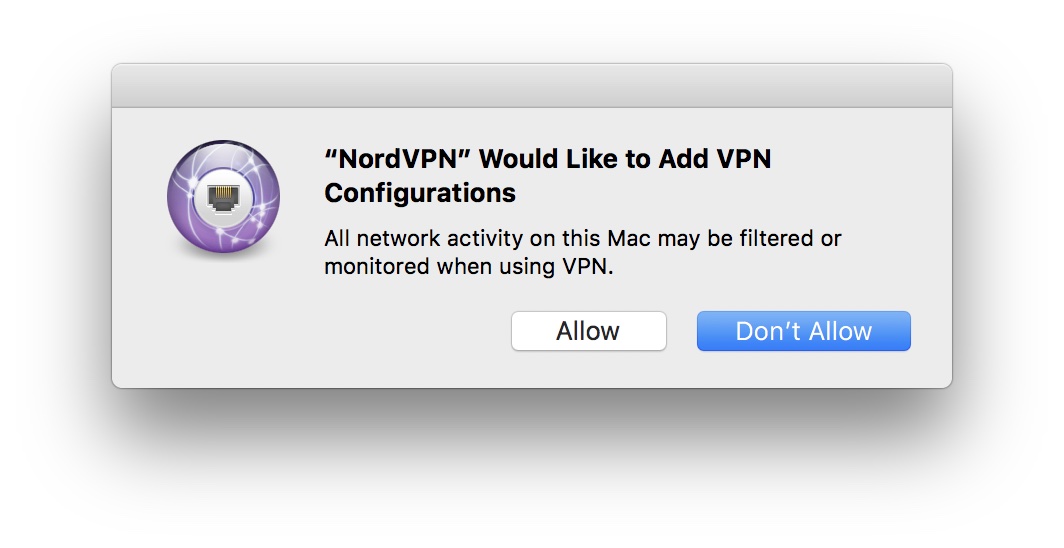
Once logged in, you’ll see a popup that asks you for permission to allow your VPN to add VPN configurations on your machine. You’ll need to press Allow and may be asked to enter the password you use to log in to your Mac.
Below, we explain how to set up a VPN that requires you to go into your Mac’s settings, but like most services, Nord’s app does all the configuration for you when you click Allow here.
As long as you have downloaded a trusted VPN app from a trusted source, this should be safe.
Choose the location of your server
Foundry
To begin using the VPN, you’ll be asked to choose a server. This could be within the country you are located if you are looking to protect your privacy and aren’t trying to access blocked content. If, however, you are trying to access a service, such as U.S. Netflix from inside the U.K., or BBC iPlayer from outside the U.K., or you want to check a website, you need to choose the relevant server location.
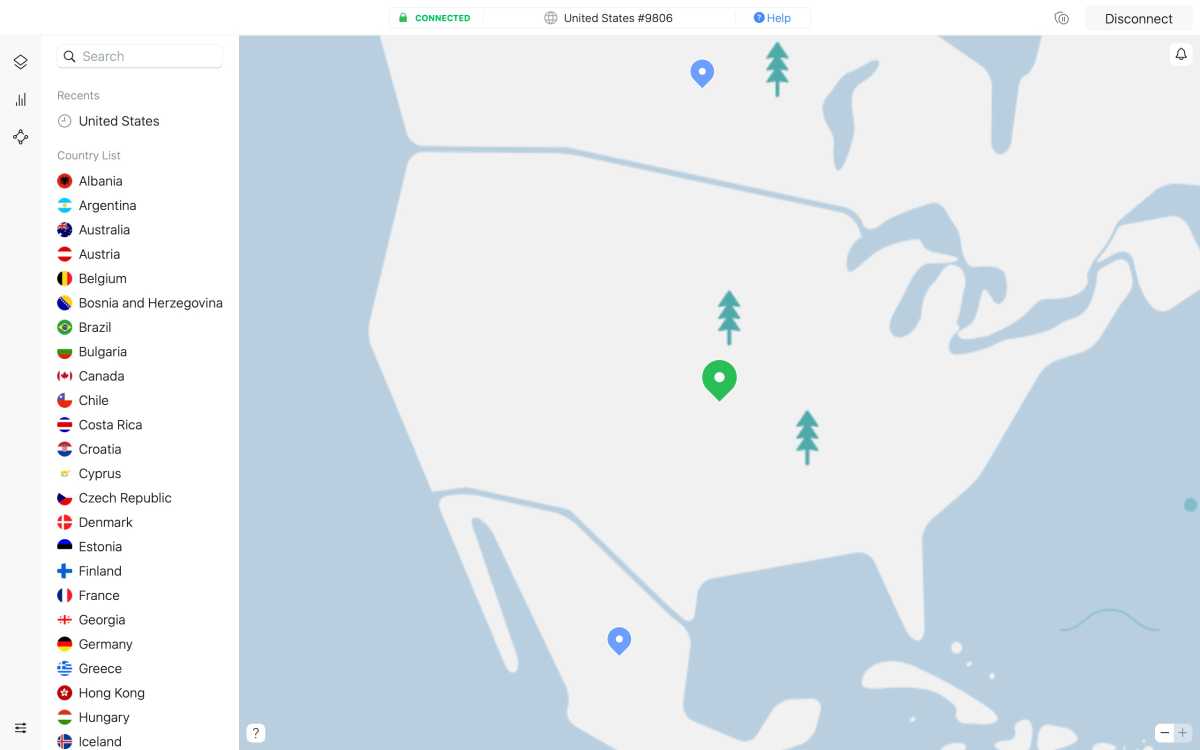
If you are using Nord, you can pick a server using the search bar in the top left corner, or scroll around the world map, or through the country list. Other VPNs will have a similar process for selecting the location of the server you will be routed via.
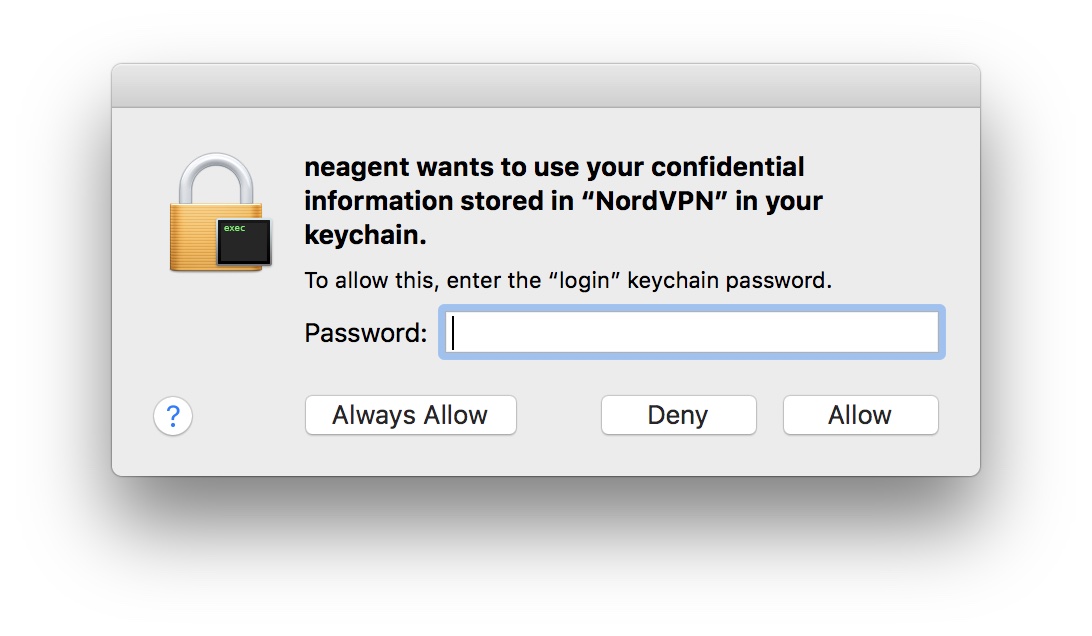
You may encounter some alerts when you try to connect to a new server for the first time. For example, you may see a message like the one above: “neagent wants to use your confidential information stored in NordVPN in your keychain.” This will only appear if IKEv2 is set as the protocol to use, but you’re better off using OpenVPN or NordLynx (based on WireGuard) if you want a faster connection.
You can type in your Mac administrator password and click Always Allow, which means NordVPN will remember the login password within your keychain for future use, and won’t ask you for it again unless you change the password.
Choose your VPN settings and preferences
Foundry
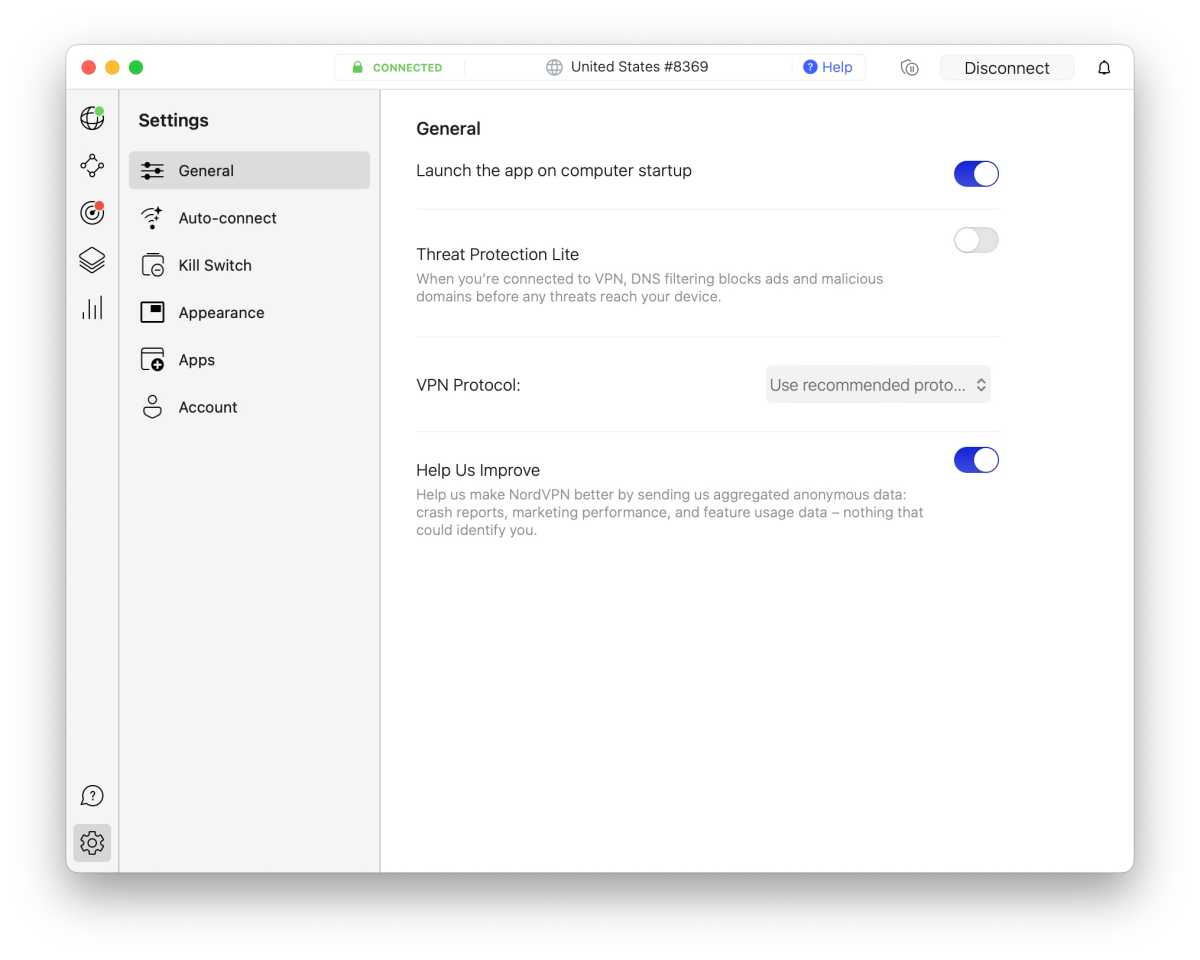
Your VPN will offer various settings. For example, with Nord you can access settings in Preferences. Click on NordVPN in the top menu and then click on Settings (Preferences in older versions of macOS).
Here you will find options like “Launch the app on computer startup” and an option to auto-connect to a particular country (see: Settings > Auto-connect). That way the VPN connects to a server of your choice from the moment you launch the application.
You can also access an advanced version of Nord’s Kill Switch here. Kill Switch should stop data leaks if your connection drops; the advanced settings give an additional layer of security. Other VPNs may have a similar feature you can find in the app’s preferences.
You’ll be able to access the VPN settings and server lists at any time by launching the app itself or using the icon in the navigation bar at the top of your computer where you’d usually find the date and time.
Once connected, you can use your Mac as normal, but in the knowledge that no one can spy on your web browsing, and you should be able to access previously blocked content.
Now switch on your VPN and you will be encrypted and appear to be in another country
Foundry
Whenever you want to surf the internet as if you are in another country, or just ensure that your data is encrypted you can turn on your VPN, select the country server you want to use, and use facilities that might not be available to you otherwise. To use a streaming service from another country you will need to be signed up for that service. Enjoy your vacation!
How to set up a VPN that doesn’t have an app
In some scenarios, the VPN service does not use its own app. Instead, you will need to go into the System Settings of your Mac and configure the Network settings. It can sound a little daunting but it’s simple once you know how.
Your VPN provider should be able to offer help installing and setting up, but this example using Hidden24 should give you some idea of what to expect.
- As with any service, you’ll first need to sign up and create an account.
- Once you have a username (usually your email address) and password associated with your account, you can begin the process of setting it up.
- First go to System Settings (or System Preferences) on your Mac and choose Network.
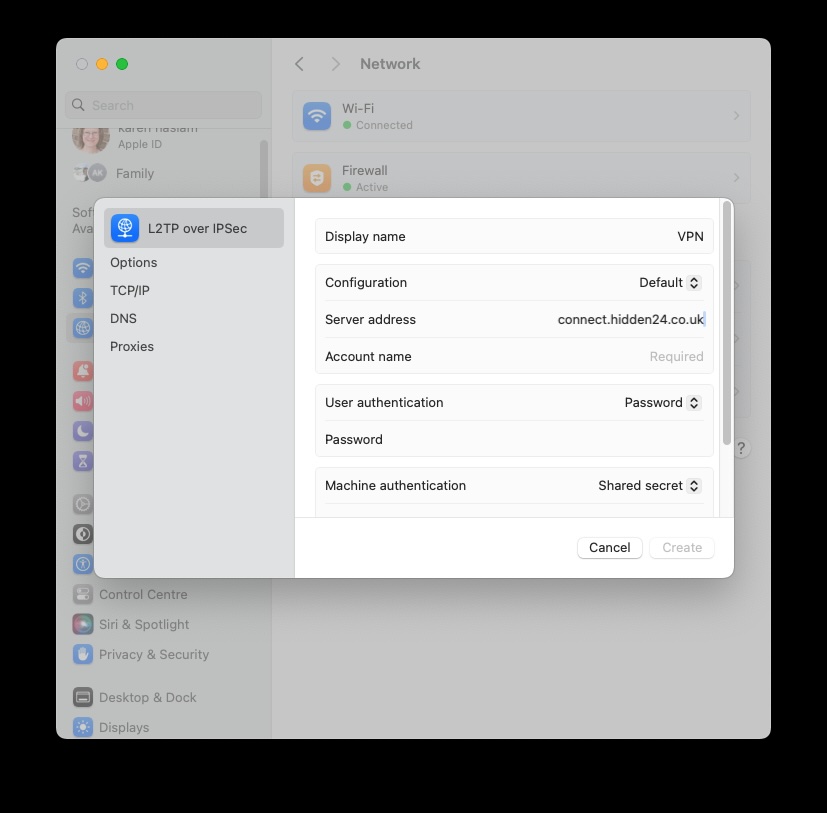
- Press the down arrow (or small + symbol) in the bottom left corner to bring up a drop-down menu. Click on Add VPN configuration and choose the VPN type and service name specified by your VPN provider from the options. (In older versions of macOS you need to click on Interface and then choose VPN). In this instance, it’s L2TP over IPSec and the service name is Hidden24.
- Enter the settings for the VPN you are using. In the Server Address field, enter the server specified by your provider. Here it’s connect.hidden24.co.uk. The account name is the username you were given when you signed up, so will be unique to everyone.
- There are Advanced options you might want to use. For example, you can choose Send all traffic over VPN connection, to ensure all apps are routed via the VPN connection – unless you specifically don’t want this to happen.
- Click Create.
- You will be prompted to enter your password, as well as a Shared Secret which you should also have been given by your provider.
- Next go to System Settings > Control Centre. Scroll down to Menu Bar Only and find VPN, click on the pop-up menu beside it and choose ‘Show VPN status in menu bar’.
- Then click OK and Apply. You’ll see a new icon appear in your menu bar, which represents your VPN.
Foundry


