Whether you’re being forced to reboot your PC after an essential update or the boot process is moving at a snail’s pace, sometimes Windows can be very disruptive to your workflow. If you’re looking to delay those updates or speed up your PC’s boot time, then you’ve come to the right place. Below, you’ll discover how to successfully eliminate those disruptive factors.
Further reading: 22 awesome free apps already installed on your Windows PC
Windows updates and restarts
Ah, the dreaded required updates. Picture this: You’re in the middle of work and Windows reports that required or optional updates are ready for installation. Now you have to stop what you’re doing to install those updates. Bummer.
Since Microsoft has designed Windows 10 and Windows 11 as a Software as a Service (“SaaS”) and implemented many applications and features directly, some components always want to be updated or installed.
Besides the actual installation routine, which can run in the background but still costs resources and have a negative impact on the performance of the PC, the mostly obligatory reboots after the installation are the biggest annoyance. The installation of updates as well as the associated rebooting usually costs valuable minutes and can be irritating in the long run.
Sven Bauduin
Security updates, function updates, cumulative updates, and optional updates–Windows always wants to install something. But this behavior can be curbed, at least to some extent.
Users who do not want to experience a forced restart after every update should proceed as follows.
Under Menu → Settings → Windows Update, the following functions should be deactivated or configured:
- Allow yourself to be brought up to date
- Receive notifications when a restart is required
- Define the times of use during which the system should not be restarted
This will at least limit the annoyances caused by new updates to a certain extent. During working hours, it can also be useful to suspend Windows updates for a certain length of time.
The corresponding measures can be taken under Settings → Windows Update → Suspend Updates. The timeout can be extended from one week to up to five weeks, after which you will receive the updates again as usual.
Lengthy boot processes
The booting of computer systems can also be a test of patience. Such behavior is usually due to lengthy initialization processes and an overcrowded Autostart. A slow hard disk or SSD can also be a cause.
During the boot process, all components such as the CPU, GPU, RAM, and expansion cards are initialized. All apps, programs, tools, and services from the operating system’s Autostart are also prepared and started before the actual desktop appears in front of the user. The entire process can take several minutes, and even when the system is supposedly fully booted, it reacts only hesitantly to the users inputs. But this can also be remedied quickly.
To ensure that software and services you do not need are not unintentionally loaded during system start-up, you should proceed as follows.
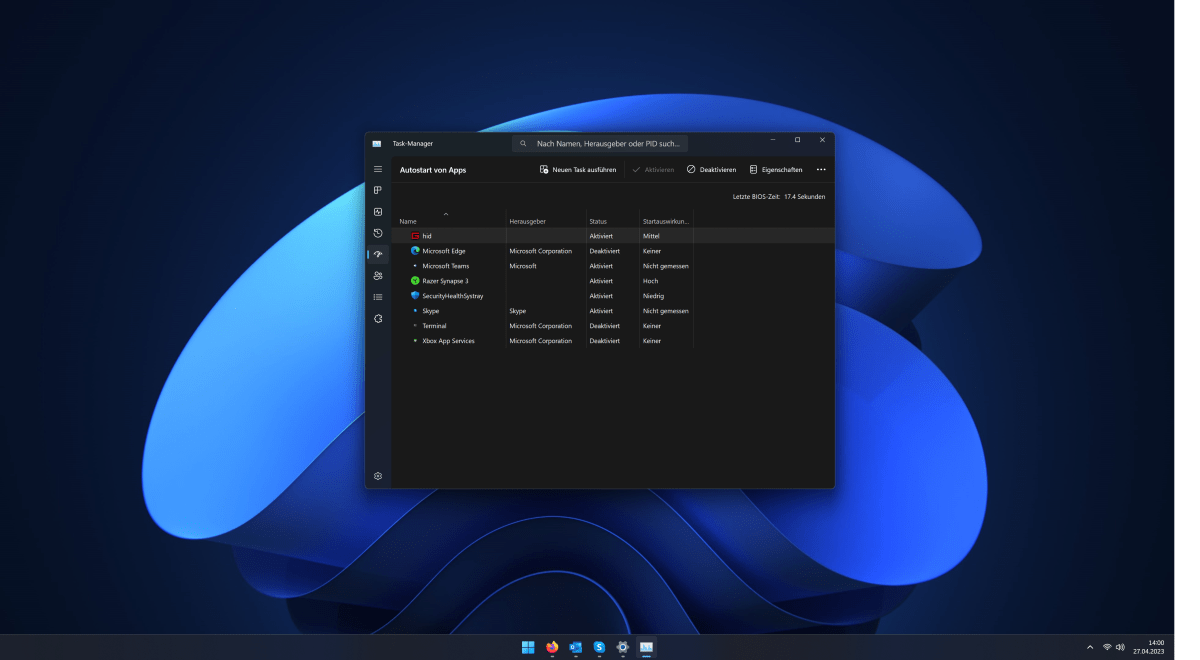
Start the task manager and clean up the Autostart. Proceed as follows:
Navigate to the Windows Icon, then Task Manager, and finally Autostart of Apps. Here, all the applications in the Autostart can be displayed.
If you find apps here that you don’t need or have installed, you can deactivate their automatic start accordingly.

Sven Bauduin
The screenshot shows, for example, that the user in this case is using Mozilla Firefox as a browser, so Microsoft Edge in Autostart can be deactivated without hesitation.
An Internet connection that’s too slow
An Internet connection that’s too slow can be annoying in many ways. Uploads and downloads take longer than necessary and websites are slow to load. In such cases, video platforms such as YouTube or streaming services such as Netflix also have to buffer delivered content, which leads to long waiting times and “stuttering” videos.
In such cases, users should proceed as follows:
- Check Wi-Fi connection or network cable
- Check Wi-Fi antennas and position them optimally
- Update drivers for Wi-Fi devices and network cards
- Restart the router and install the latest firmware if necessary
- Check the Windows system settings
Navigate to the Menu and then Network and Internet. Here, you can change the settings for the Internet connection under Windows. You’ll also find the necessary settings for both wired (Ethernet) and wireless (Wi-Fi) access to the Internet.
Lack of data protection and telemetry data
Windows 10 and Windows 11 are known for being particularly fond of “phoning home” and also collecting sensitive data and sending it to Microsoft as telemetry data. However, this annoying behavior, which also takes up resources and computing power, can at least be limited as far as possible.
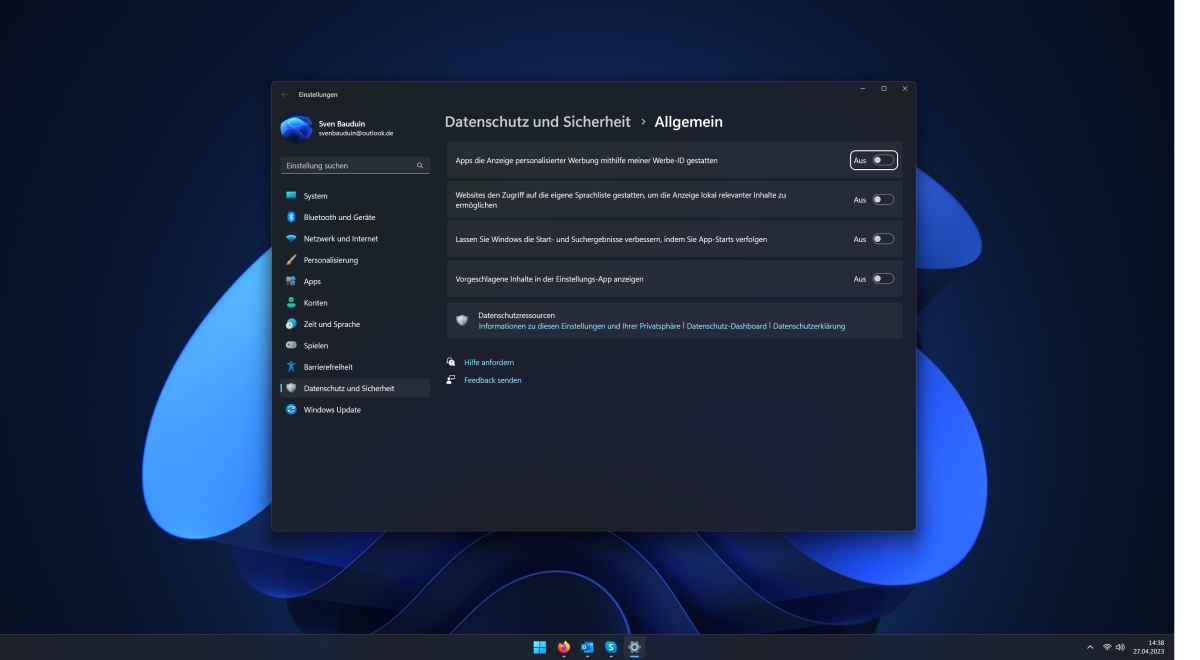
Go to the Menu and then Privacy and Security. The following telemetry and advertising measures can be deactivated with a few clicks:
- Advertising ID for personalized advertising
- Suggested content within the apps
- Access by apps to camera, microphone, and contacts
In addition, it’s possible to determine whether Windows sends a complete report of the telemetry data to Microsoft or only transmits essential data.

Sven Bauduin
Users who want to know what data is transferred to Microsoft and which devices are included can view this information at any time via the privacy dashboard.
Always new drivers for the hardware
Under certain circumstances, it can take a lot of time to always have to update the drivers for the installed hardware. Mainboards and chipsets in particular as well as graphics cards usually want to be updated almost monthly.
In such cases, users should leave the updating of drivers directly to the operating system. Appropriate drivers are distributed and installed via Windows Update after successful WQHL certification, so there is no need for manual installation.
In addition, updaters such as the Driver Update Monitor or GeForce Experience from Nvidia, which automatically keeps the GPU driver up to date, can provide real support.
Data rubbish on your SSD
Another major annoyance is data rubbish, which over time occupies the precious storage space on your SSD.
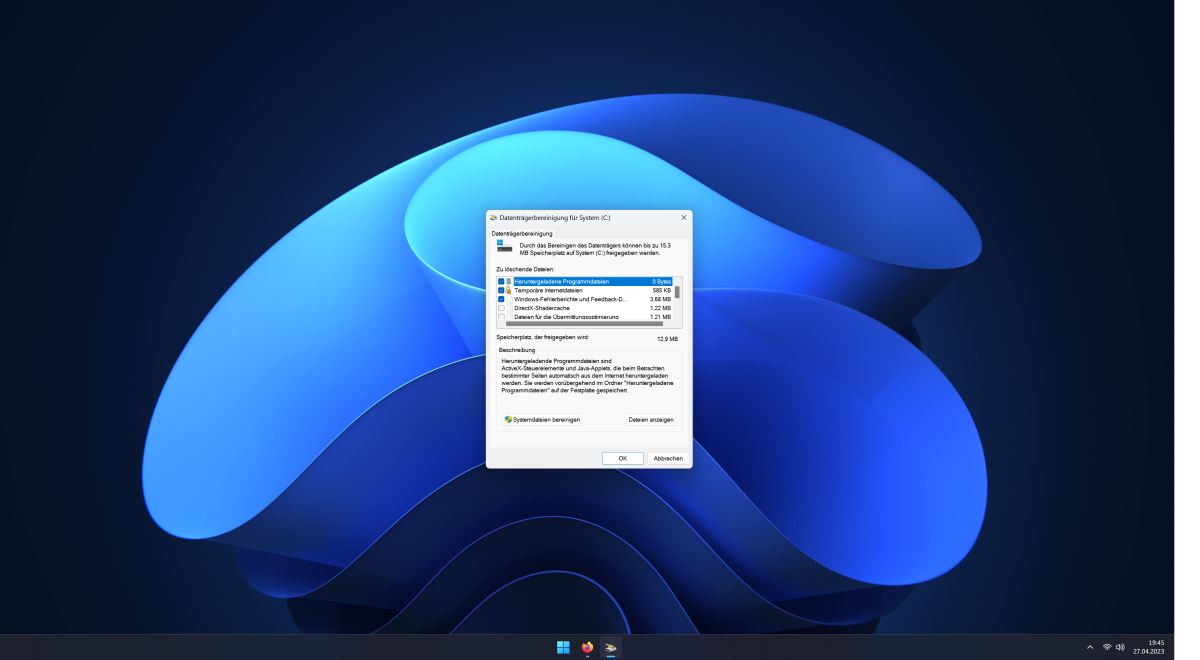
While the numerous Windows updates, temporary files, and remnants of installation routines and uninstalled programs gradually eat up the storage space on SSDs, users can get on top of this problem using on-board tools. The magic word is Disk Cleanup and it keeps the SSD and hard drive tidy.
This system tool is executed under Windows 10 and Windows 11 via Apps → Disk Cleanup.

Sven Bauduin
The tool can be used to completely remove the following data residues from the system and thus from the SSD:
- Downloaded program files
- Old Windows feedback files
- Temporary internet files
- Windows error reports
- Files in the Recycle Bin
- Temporary files
- Shadercache
In some cases, several gigabytes of valuable storage space can be freed up in this way.
This article originally appeared on our sister publication PC-WELT and was translated and localized from German.


